As an Amazon Associate, we earn from qualifying purchases. Some links on this site are affiliate links at no extra cost to you. Our recommendations are based on thorough research and editorial judgment.

Weather Considerations for Outdoor Instant Photography
When we think about outdoor instant photography, weather plays a crucial role in our shots. Overcast skies provide soft, diffused light, ideal for portraits. Sunny days require careful exposure management, while rain can enhance colors and add artistic flair. Shooting during golden hour offers warm tones and longer shadows, and dusk presents vibrant pastel colors. Night photography brings challenges like longer exposure times and potential noise, but we can creatively use ambient light. Let’s explore how to optimize for every weather condition!
Key Takeaways
- Overcast days provide soft, diffused light ideal for portraits, reducing harsh shadows and enhancing skin tones in instant photography.
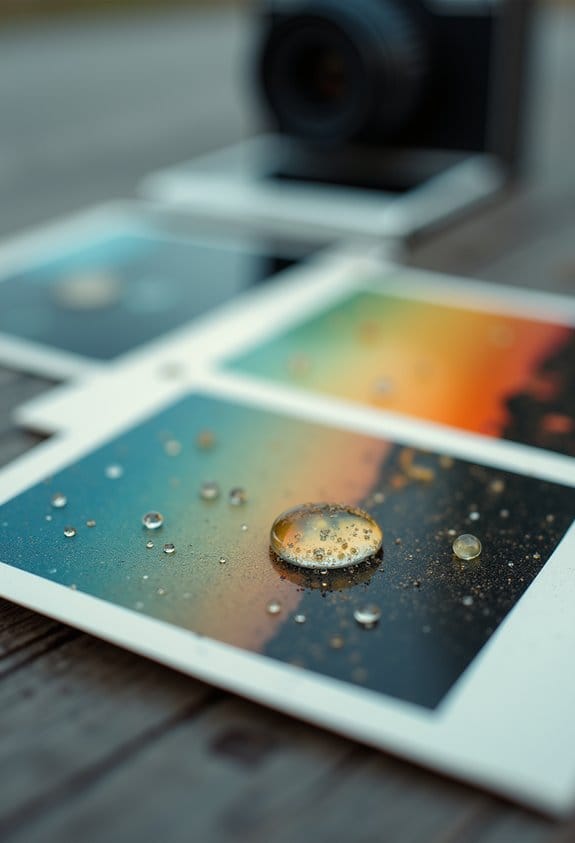
- Rain enhances color saturation and offers unique reflections, making vibrant scenes more appealing; use rain covers to protect your camera.
- Misty conditions require manual focus for clarity, as fog can obstruct autofocus; brighter light helps improve image quality with instant film.
- Sunny weather calls for careful exposure management; use golden hour for softer lighting and avoid unflattering shadows during mid-day.
- Prepare for changing weather by checking forecasts and keeping extra film warm to ensure proper development in damp conditions.
Understanding Different Weather Conditions
You may be interested


When we’re out in the field with our cameras, understanding weather conditions really helps us capture those breathtaking shots. For instance, an overcast sky acts like nature’s softbox, giving us that lovely diffused light that reduces harsh shadows—perfect for portraits! On sunny days, though, we have to be careful with exposure. That’s why shooting during the golden hour, when the sun softens, can work wonders.
Rainy days can be a bit tricky but also magical. The colors pop like crazy, and you can catch some amazing reflections, as long as you protect your gear with rain sleeves! And when it snows, you want to use fast shutter speeds. This prevents motion blur from all those falling snowflakes, letting you freeze those gorgeous scenes in time.
Each weather situation really changes how we see light and visibility, especially with macro lenses. It’s all about checking the forecast and seizing those shooting opportunities! With that in mind, let’s talk about how to prepare our gear for different weather challenges. Using automatic exposure control on instant cameras can help adapt quickly to changing light conditions outdoors.
The Advantages of Overcast Skies

Hey there! Let me tell you about why overcast skies can be your best buddy for outdoor photography. When the clouds roll in, they create this beautiful, soft light that works wonders for our pictures. You know how harsh sunlight can cast those unflattering shadows on people’s faces? Well, on an overcast day, that even lighting really helps enhance skin tones and reduces those pesky shadows, making everyone look great.
Plus, the colors really pop! Take a moment to think about shooting flowers or landscapes—on a bright sunny day, the colors can wash out a bit, right? But with the softer hues of overcast lighting, you’re able to capture those rich textures and vibrant details that bring your photos to life. It’s almost like nature’s own filter!
Another cool perk is that with this consistent light, you can often lower your ISO settings without compromising your shutter speed. This means clearer images and less noise, especially when you’re shooting detailed subjects like architecture or close-ups of nature. Plus, there’s a unique moody aesthetic that overcast days provide, perfect for those creative shots or storytelling moments. Using acid-free materials to protect your instant photos will help maintain their quality after capturing such stunning outdoor shots.
Capturing the Magic of Misty Mornings

Hey there! Have you ever noticed how misty mornings offer such a magical vibe for photography? The way the soft light plays with the fog can really transform a simple scene into something special. For instance, if you head out just before dawn, you’ll notice that’s when the mist is often at its thickest, and it creates beautiful, even lighting—perfect for capturing those landscape shots or intimate portraits.
One trick to make your photos pop is to include some foreground elements, like a flower or a rock. This gives your images a sense of depth, pulling the viewer in and making them feel part of the scene. Just a heads up though—when the fog is really dense, your autofocus might struggle. Switching to manual focus can make a big difference in ensuring your subject is nice and clear.
For best results, using Polaroid film that requires bright light or flash will help enhance image quality even in misty conditions.
Techniques for Shooting on Sunny Days
Shooting photos on sunny days can be such a rewarding experience, but it definitely has its challenges! One of the best ways to handle that harsh sunlight is by scheduling your shoots during the golden hours—those magical times in the early morning or late afternoon when the light is softer and more flattering. For example, if you’re planning a portrait shoot, you might want to meet your friend for that perfect shot just after sunrise. It can make all the difference in minimizing those pesky shadows.
Another trick is to position your subjects with their backs to the sun. This way, you create a lovely halo effect around their hair, and it helps them avoid squinting, which is a win-win! If you have a reflector handy, use it to bounce some light onto their faces; it really brightens up the image and adds a nice sparkle to their eyes. Just picture your friend’s bright smile against that beautiful glow!
A great addition to your toolkit is a scrim, which helps diffuse strong sunlight. This softens the light even more and can be fantastic for portrait photography. Don’t forget to play around with shadows too—experimenting with different angles and positions can add depth and interest to your photos. Sunny days don’t have to be daunting; with these simple tips, you can transform your shooting experience and capture some truly enchanting images. Using color filters can also creatively enhance the mood of your sunny-day photos. Now, let’s chat about what to do when the clouds roll in!
Maximizing Opportunities in Rainy Weather
Hey there! You know, while sunny days might give us that perfect lighting for photography, I think we often overlook how awesome rainy weather can be for snapping photos. It’s a fantastic opportunity to capture vibrant colors! When it rains, the saturation of the surroundings really pops—like when those red flowers bloom against a grey sky. Plus, think about all those reflective puddles; they can transform an ordinary street scene into something really artistic.
Another trick to try is using backlighting to highlight raindrops. It creates these dramatic effects that can bring out the mood of a scene. Just imagine capturing a silhouette of someone with a glowing umbrella backed by the warm colors of a sunset peeking through the clouds. And don’t forget about protecting your camera from moisture! A simple rain cover or even holding an umbrella over your gear can save the day.
It’s also a great idea to include people in your shots. They bring a narrative and can evoke emotions that resonate with viewers. Think about a candid shot of someone laughing in the rain—it tells a story all on its own. So, grab your camera and hit the streets! You never know what magical moments you might capture when the skies open up. Using a proper photo storage solution afterward, like a shadow box, can help preserve your instant photographs beautifully.
The Artistic Potential of Snowy Scenes
There’s something truly magical about stepping into a snowy landscape, right? Snowy scenes can really elevate your photography. The bright white snow acts like a giant mirror, reflecting light and creating amazing contrasts, especially with darker elements in your shot. It’s like nature’s own softbox, making everything pop!
If you’ve got a camera, grab a tripod and go out into that winter wonderland. You can capture those serene snow-covered landscapes where the fresh snow smooths out edges and gives everything a dreamlike quality. Want to zoom in on the tiny details? Try taking close-ups of snowflakes. Each one is unique, and you can highlight those intricate patterns beautifully.
And here’s a cool tip: use a fast shutter speed to freeze those falling snowflakes in action. It adds a dynamic touch to your photos that really brings them to life. Overall, snowy weather opens up such rich opportunities for photography that can blend beauty and tranquility. It’s definitely worth getting out there and experiencing it for yourself. What do you think about those chilly adventures? Remember to keep your instant film in a refrigerated environment before shooting to maintain its quality in cold outdoor conditions.
Tips for Shooting During Golden Hour
Hey there! Have you ever tried capturing photos during golden hour? That magical time just after sunrise or before sunset can really elevate your photography game. The warm tones and soft light make everything look stunning. For instance, a portrait taken at this time can have a beautiful golden glow on the subject’s skin, making it pop.
You’ll also notice that the sun sits low in the sky, casting longer shadows. This gives your shots more depth and dimension. It’s a good idea to scout out your locations ahead of time to ensure you’re set up perfectly for those golden rays. Plus, during this hour, you can dial down your ISO settings. This adjustment reduces noise, leading to clearer images—great for those quick snaps!
Don’t forget that the length of golden hour changes depending on the season and where you are. A handy app to check sunrise and sunset times can be a great help for planning your shoots. And when using instant cameras during this time, selecting the right instant camera film refill can significantly enhance your photos’ quality and durability. So, mark your calendar, grab your camera, and let’s take advantage of this beautiful light for our next photography adventure!
Exploring Evening Light: Dusk and Blue Hour
Hey there! Have you ever noticed how magical the sky looks as the sun dips below the horizon? That beautiful transition into dusk is one of my favorite times to grab my camera. The colors shift into pastel shades, and it feels like the whole world is putting on a show. Shortly after, we enter the blue hour, which is simply stunning. Picture this: a deep blue sky contrasting with the sparkling lights of the city below. It’s a sight you don’t want to miss.
During dusk, the long shadows can create amazing silhouettes, perfect for photography. Just imagine capturing a tree outline against a vibrant orange sky or a skyline where the buildings appear as dark shapes against that beautiful backdrop. When the blue hour rolls in, the light becomes softer and more even, allowing you to see intricate details that might get lost during the day. This is a fantastic time for landscape shots—think about capturing reflections in a calm lake or the intricate architecture of a building lit up against that deep blue tone.
One quick tip: since the light gets low, using a tripod can really help stabilize your shots and keep them crisp, especially if you’re using slower shutter speeds. To keep your instant photos looking vibrant after capturing them during these times, consider storing them in a photo album binder for long-term preservation. So, the next time you find yourself outside during dusk or the blue hour, take a moment to look around and snap some photos. Trust me, you’ll be amazed at the magic just waiting to be captured!
Night Photography Challenges and Solutions
Once the colors of dusk have disappeared and the blue hour wraps up, night photography presents a captivating challenge. When you’re working in low light, you’ll typically want to use longer exposure times, usually between 10 to 30 seconds, to really capture all that beauty. A sturdy tripod is your best friend here; it helps keep your camera steady and prevents those pesky vibrations that can blur your shots.
To make the most of the available light, try setting your aperture to a lower value, like f/2.8 to f/5.6. This lets in more light and can also give you some creative control over the background blur. If you’re worried about noise creeping into your images, you can bump your ISO up to around 800 or higher, but just be cautious—too much can make your photos look grainy. And don’t forget to use a remote shutter release or the timer on your camera. This little trick minimizes vibrations even more, resulting in clearer shots.
When you’re out there, play around with different light sources to add interest to your photos. For instance, streetlights and neon signs can create beautiful contrasts and vibrant hues that make your images pop. It’s all about having fun and seeing what unique combinations you can come up with. So, pack your gear, and let’s explore the magic of night photography together!
To keep your precious images safe after the shoot, consider using albums made from durable materials and protection features specifically designed for instant photos.
Preparing for Changing Weather Conditions
Hey there! So, what do we do when the weather suddenly changes while we’re out snapping photos? Well, first off, it’s super important to check the weather forecast before heading out—trust me, it can save you a lot of trouble! If you know rain might be on the way, bringing weather-resistant gear, like a rain sleeve for your Polaroid camera, can really save the day.
Now, let’s talk about keeping your film safe. Using plastic bags or airtight containers can help protect your film from humidity when you’re moving between different environments, like going from a wet outdoors to a dry car. Just picture it: you’re capturing a stunning sunset, and suddenly, the clouds roll in. Quick adjustments to your camera settings can help you manage the changing light. For example, you might need to crank up your ISO or adjust your shutter speed to keep those shots looking great!
And here’s a handy tip—keeping extra film warm in your coat or a thermal bag can really make a difference in chilly or damp weather. It helps ensure your film develops perfectly. So, by preparing ahead of time, you can keep enjoying your photography adventures, no matter how unpredictable Mother Nature can be! Ready to pack that gear and keep clicking? Remember to bring along a compact camera care kit to quickly clean your lens if moisture or dust accumulates during your shoot.
Frequently Asked Questions
What Is the Best Weather for Outdoor Photography?
We believe the best weather for outdoor photography combines ideal lighting with cloud cover during the golden hour. Weather effects like rain photography and seasonal changes enhance our creativity, while temperature variations and wind considerations keep us alert.
What Is the 20 60 20 Rule in Photography?
We’ll embrace the 20-60-20 rule in photography: spending a fifth on planning, two-thirds capturing, and the last fifth editing. This balance helps us navigate lighting conditions, color temperature, and composition techniques, ensuring stunning results every time.
Does Cold Weather Affect Polaroid Pictures?
Yes, cold exposure definitely affects Polaroid pictures. It impacts film sensitivity, developing time, and camera operation, leading to reduced image quality and color saturation, as well as potentially shortening battery life during the printing process.
What Is the Sunny 16 Rule in Photography?
The Sunny 16 Rule helps us achieve sunny exposure by setting aperture to f/16 and matching shutter speed to ISO. We adjust for bright lighting, manage contrast, and capture shadow details effectively, even with cloud coverage.