As an Amazon Associate, we earn from qualifying purchases. Some links on this site are affiliate links at no extra cost to you. Our recommendations are based on thorough research and editorial judgment.

Using Color Gels for Creative Instant Photography Effects
Using color gels in instant photography can really elevate our creative game. By incorporating warm and cool hues, we can markedly alter the mood of our shots. A simple setup might involve a single gel behind our subject, while more complex arrangements can include multiple colored lights for rich, dynamic effects. However, we must manage light carefully to guarantee accurate colors. We’ll explore more tips, setups, and techniques to master this vibrant photographic art form.
Key Takeaways
- Utilize vibrant color gels to replace plain white light, enhancing the mood and visual impact in instant photography.
- Experiment with one, two, or three colored gel setups to create depth, contrast, and striking visual effects in your images.
- Incorporate rim lighting techniques with colored gels to establish dramatic outlines and enhance subject features effectively.
- Adjust white balance and saturation during post-production to fine-tune colors and eliminate unwanted color casts from instant film shots.
- Showcase various moods in your portfolio by maintaining consistent gel use, with before-and-after shots demonstrating the transformative effects of color gels.
Understanding Colored Gels

You may be interested


Hey there! Have you ever thought about incorporating colored gels into your photography? They’re such a cool tool for tweaking the light from your sources and really ramping up the mood of your images. Think of them as filters that can either make your subject pop against the background or help them blend in, depending on how you want to craft the scene.
Using colored gels is super fun, and you can experiment with various colors and saturation levels to get the look just right. For instance, if you’re shooting a sunset portrait, a warm orange gel can add a beautiful glow that complements the natural light. Or, if you’re going for a moody atmosphere in a landscape shot, a deep blue gel can create that dramatic effect.
And here’s a little secret: you don’t even need to buy fancy gels. You can make your own at home with just some cellophane and tape! It’s a creative and budget-friendly way to enhance your photography. So, why not give colored gels a try and see what new vibes you can bring to your shots? For instant film cameras, be mindful of their automatic exposure settings when using colored gels to ensure your photos come out beautifully lit.
One Color Gel Setup

Hey there! You know how colored gels can really transform your photography? Let’s chat about a fun technique called the One Color Gel Setup. Instead of sticking with plain white light, we can swap in some vibrant Color Gels to give our shots a creative kick.
Imagine choosing a bold blue gel for a portrait. You’d place it behind your subject to create a stunning backlight that gives them a cool halo effect. By experimenting with how far away the light is, you can also adjust how soft or intense that color looks in your shot. Just remember to keep all the gels in your setup equally saturated for a cohesive vibe. For best results, consider using ring lights with adjustable color temperature settings to complement the color gel effects seamlessly.
Recommended Products
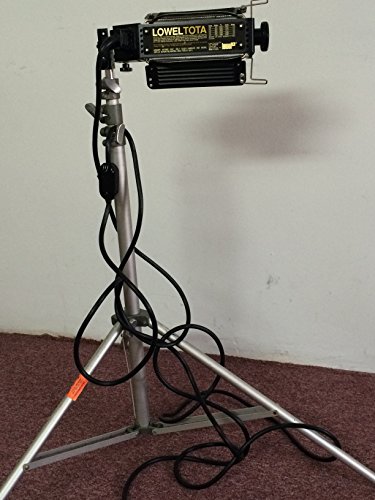
Multi-use, halogen source


CREATE HIGH-QUALITY PHOTOS & VIDEOS: This background is easy to light and pulls taut for a smooth and seamless look for professional quality photography and videos
Double Colored Gel Setup

Have you ever tried using a Double Colored Gel Setup in photography? It’s a fantastic way to play with color and create some really eye-catching images. Basically, you set up two lights with different colored gels aimed at your subject’s face. This creates a beautiful color division, and if you position that division right down the center—usually around the nose—you get a balanced look.
For instance, if you use a blue gel on one side and an orange gel on the other, you’ll see how they interact and complement each other. Adjusting the brightness of the gels can really tailor the effect—more vibrant colors can stand out, while softer shades can create a more subtle atmosphere. Also, keep in mind that moving the lights farther away from your model affects how the colors mix.
Don’t hesitate to experiment with different color combos, like green and purple or red and yellow. It can add incredible depth to your photos and set your work apart from typical setups. So, grab those gels and start exploring! There’s a whole world of creative expression waiting for you in your next shoot.
Using high-quality color filters can further enhance the vibrancy and mood of your shots, making your creative efforts even more impactful.
Recommended Products

Provide 20 sheet of lighting gels with size 10x10 in/ 25x25 cm, using combinations of these filters to create amazing effects.

UPGRATED ULANZI L1 PRO—— The CUTE LITE waterproof light adopt magnetic charging interface design, The lamp body is enclosed, completely solve the problem of water in the charging port. The led camera light waterproof up to ip68, completely waterproof to 32ft (10m). And upgrade the accessories, adding more accessories.

Tri-Color Gel Setup
If you’re already having fun with the Double Colored Gel Setup, wait until you try the Tri-Color Gel Setup! This approach opens up a world of creative possibilities in photography, using three colored lights along with a white light for that nice softness. Imagine placing a lighter colored gel in the center, with darker gels on the sides—it really adds depth and makes your subject pop.
Think of it like a traditional triangle lighting scheme. For example, you could use a bright yellow gel in the middle and pair it with deep blue and rich red on the sides. Adjusting the strength and saturation of each gel allows you to shift from vibrant hues to more understated tones. Remember, how you light your scene plays a huge role in setting the mood you want to capture.
As you play around with this setup, you’ll find it gives you the flexibility to bring your creative vision to life. Experimenting with colors and placements can lead to some stunning results, so keep that camera ready for your next shot! Combining gel lighting with instax mini film can enhance your photos with vibrant colors and quick development times.
Recommended Products

Spacious 100-Gallon Aquarium: Perfect for both Freshwater and Saltwater. Perfect for enthusiasts and professional setups.

【Super Bright】Combo beam with triple row and nest reflector cup design in the middle for extreme light efficiency

【Bright & Safe】With 783pcs 3W powerful high intensity LED light chips. 60° flood beam and 30° spot beam combo in reflective cups provide a brighter illumination, 6000K bright white light and broader view, increasing safe for your night fishing, night hunting, night ride or any other night activities
Specialized Gel Setups
Hey there! Let’s chat about specialized gel setups in photography. They’re super fun and can really change the way your images look. For instance, when you use colored rim lights alongside a white light, you can create these striking edges that really define your subject’s shape. Imagine using a deep purple or vibrant red—these colors can transform a simple portrait into something that catches the eye instantly.
If you’re looking to set your subject apart from the background, you can use a background light gel. This adds color to the backdrop, giving your shot a nice depth. Just be mindful of where you place your lights! You want to avoid any color bleeding, which can muddy your image. A soft white light mixed in with the gels helps blend everything beautifully—think of it as the finishing touch that adds to the artistic vibe.
And here’s a little tip: play around with the intensity of your gels! By adjusting how strong or soft the light is, you can create different moods for each shot. So whether you’re going for a moody scene or something bright and playful, your gel setups can really reflect that. It’s a great way to have fun with your photography. Now, speaking of creativity, let’s talk about how to choose the right colors for different subjects!
To display your instant photos of these creative shots, consider using damage-free removal options like command strips that secure memories without harming your walls.
Recommended Products
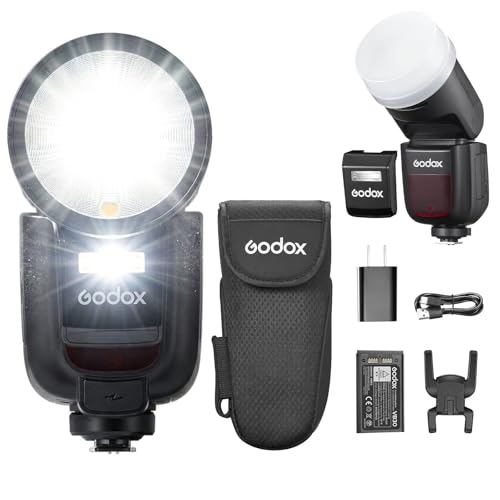
📸[Upgraded version of Godox V1 flash in 2024] The Godox V1 Pro version utilizes a similar compact, shoe-mounted design of Godox V1 flash while bringing additional features. Attach the included auxiliary flash to the V1 Pro C for improved portrait results in manual or TTL modes. Switch modes swiftly with the TTL/M button, With a user-friendly interface, avoiding cumbersome adjustments in dynamic scenes like weddings, ensuring flexibility in photography.

Never struggle with harsh shadows again. Equipped with 2 dimmable LED panels and a high CRI (Color Rendering Index) >98, this light box reproduces colors with stunning accuracy. Whether you're shooting product details or portraits, the light is flicker-free and soft, ensuring your subject looks true-to-life straight out of camera—saving you hours of post-processing work.

Pro-Grade Photography Light: The RM01 mini LED lighting kit is equipped with high-quality COB beads (CRI95, TLCI96), offering daylight-balanced 5600K. Weight only 63g (2.22oz) per pack, mini, lightweight, but powerful.
Essential Equipment for Gel Photography
If you want to create some jaw-dropping shots with gel photography, having the right gear is key. For instance, off-camera flashes like the Profoto B10 are a fantastic option because they’re portable, letting you adapt to all sorts of environments. Plus, they help you get that perfect lighting in no time.
Now, if you’re looking to soften those shadows and really enhance your gel lighting, consider using the MagBox Pro 24 for light diffusion. It’ll give your photos a much nicer feel. And when it comes to switching up colors quickly, the MagGrip 2 is a lifesaver. With it, you can easily swap out color gels during a shoot, which is perfect for keeping the creative flow going.
Speaking of color gels, try out some popular ones like 1/2 CTO for warming up your light, 1/2 CTB Blue for cool vibes, or 1/2 Plusgreen for a unique twist. These gels not only help with color correction but also add some cool effects to your shots. Just keep an eye on the heat output, especially with powerful lights like the Godox VL150II, to prevent anything from melting. It’s all about staying safe and having fun while you create!
When shooting with instant cameras, remember that ISO ratings impact color vibrancy and photo clarity, so pairing your gel lighting with films of ISO 800 can elevate your results significantly.
Recommended Products

🌟【STUDIO QUALITY LIGHTING】: An amazingly versatile studio lighting fixture that featuring 0-100% dimming, a max output of 2850 lumens, adjustable color temperature from 6500-2700K as well as a full spectrum RGB and pre-programmed special lighting effects.

PROFESSIONAL 2-LIGHT STUDIO SOLUTION – Ideal for photographers needing a complete, reliable setup for portraits, products, video, and content creation.

【2x 180W Studio Flash Kit】 Godox K180A 2-light studio flash kit for Photography: features 75W 3200K yellow color continous lamp and 180W 5600K white blance strobe light, built in energy save sensor and cooling fan. Flash output is adjustable from 1/8 to full stepless, flash duration: 1/2000-1/800s, GN 45. Satisfys the light requirements in different environment.
Lighting Techniques and Setups
Hey there! Have you ever thought about using gels in photography? They can totally transform your lighting setup and give your images a unique flair. For a simple start, just swap out your regular white light with a vibrant color gel. It’s amazing how just adjusting the distance from your subject or tweaking the shutter speed can change the overall effect.
If you’re looking to create some dynamic vibes, try a double color gel setup. Set up two lights on either side of your subject, each with a different gel color. You can really make your images pop! And if you want to add more depth, consider a tri-color arrangement. This involves mixing a soft white light with colored gels, which can bring a whole new level of richness to your shots.
Rim lighting is another fantastic technique, especially with blues and purples—it gives a dramatic edge to portraits. Simply place a light behind your subject to create a glowing outline. By playing with the placement of your gels, you can achieve some striking effects that highlight your subject’s skin tones beautifully. It’s all about experimentation and having fun with colors! Speaking of fun, let’s talk about some practical ways to incorporate these techniques into your next photoshoot. Choosing LED lights with a high CRI rating ensures your color gels display their hues vividly and accurately in your images.
Post-Production Tips for Gel Photography
Hey there! When it comes to gel photography, post-production is where the magic really happens. Think of it as the final polish that turns cool shots into jaw-dropping images. First off, keep an eye out for any unwanted color casts that might pop up, especially when you’re using multiple gels. Adjusting the white balance in tools like Photoshop or Lightroom can help you get rid of those off hues.
For instance, if you used a blue gel but your image looks a bit too green, tweaking the white balance can make a huge difference in bringing back that intended vibe. Another fun tip is to play around with the saturation. If you feel the colors are too dull, bumping them up a notch can really intensify the emotion in your photo.
Don’t forget to check out contrast adjustments! These are great for making your images stand out. If you want to get really specific, using color curves allows you to fine-tune individual color channels. It’s like painting with light! This way, you can create effects that really pop. Also, keeping in mind the lighting conditions for best results can help ensure your colors develop vibrantly and accurately during instant film processing.
Building a Portfolio With Gelled Photography
When you start building a portfolio with gelled photography, it’s super important to showcase different moods and colors that not only reflect your creativity but also your technical skills. Color gels are fantastic tools for adding that extra flair to your shots! For instance, a deep red gel can give your portrait an intense, dramatic feel, while a soft blue gel might create a calming atmosphere for a landscape.
Consistency is key, so if you pick a theme for a few shoots, try to use similar gels. This helps tie everything together visually and shows off your unique style. Also, consider including before-and-after shots. They really demonstrate the impact of color gels and how your editing skills can enhance the final look.
Don’t forget to share your gelled photography on social media! It’s a great way to gain visibility and get feedback, which can help you refine your style further. Plus, regularly updating your portfolio with new techniques keeps things fresh and shows how you’re evolving as a photographer. Speaking of evolution, let’s explore how you can experiment with different gel applications to really push your creative boundaries!
For best results, remember that proper light management is crucial when working with instant films, as it significantly affects the color and development of your photographs.
Frequently Asked Questions
How to Use Color Gels in Photography?
To use color gels in photography, we’ll explore color gel techniques for lighting color balance, experiment with creative color pairings, and adjust gel color mixing for mood, while considering color temperature effects and gels and shadows.
What Is the 20 60 20 Rule in Photography?
The 20 60 20 rule in photography guides us to balance our time effectively: planning for exposure triangle, shooting for dynamic range, and post-production to enhance color harmony, light temperature, and mood creation in visual storytelling.
How to Get Vibrant Colors in Photography?
To get vibrant colors in photography, we must consider color theory, use saturation control, and balance light temperature. Incorporating complementary colors and enhancing color contrast helps improve overall color perception in our images.
How to Fake Color Gel Lighting in Photoshop?
To fake color gel lighting in Photoshop, we can use color blending techniques, apply digital color manipulation, and adjust lighting effects. Let’s enhance mood tones with creative color application and explore effective photo editing tricks for flawless results.