As an Amazon Associate, we earn from qualifying purchases. Some links on this site are affiliate links at no extra cost to you. Our recommendations are based on thorough research and editorial judgment.

Understanding Your Instant Camera’s Settings and Modes
Understanding your instant camera’s settings and modes can greatly enhance our photography. We can adjust exposure compensation to prevent washed-out images on sunny days. The self-timer helps with group shots, allowing us to get into position. Flash settings vary for different lighting; using forced mode boosts low-light subjects. Macro mode captures details up close, perfect for nature photography. By experimenting with these features, we can take our skills to the next level, leading to stunning results. Keep exploring further for more tips!
Key Takeaways
- Adjust exposure compensation by up to 2/3EV to balance brightness and enhance colors, especially in bright conditions.
- Use the self-timer for group shots, allowing subjects to position themselves effectively with a ten-second countdown.
- Explore various flash settings, such as Auto and Red Eye modes, to optimize exposure in different lighting conditions.
- Utilize Macro Mode for close-up shots, capturing intricate details from 30cm to 60cm away, enhancing the image’s sharpness.
- Experiment with creative effects like Lighten/Darken and built-in film filters to expand your photography’s creative possibilities.
Exploring Exposure Compensation

You may be interested


Hey there! Let me tell you about exposure compensation on instant cameras, like the Fujifilm Instax. It’s such a handy feature that can really help you snap better pictures, especially in tricky lighting situations. For instance, if you’re taking photos on a bright sunny day, you might notice your images come out too bright, with details washed out. That’s where exposure compensation steps in!
You can tweak the exposure settings by up to 2/3EV, which can make a significant difference in those bright conditions. Imagine you’re at a picnic and the sunlight is glaring down—just dial back the exposure a bit, and you’ll capture those vibrant colors without losing detail.
Now, it’s worth mentioning that while this feature is fantastic for many scenarios, it has its limits in really extreme lighting—like a super dark room or blazing sun. But overall, getting the hang of exposure compensation can really enhance your photography skills, ensuring your photos are just the right brightness. So, let’s get into how you can practice this with some real-life examples!
Also, remember that instant films typically require sufficient lighting for the best results, so adjusting exposure can help optimize your photo quality.
Recommended Products

INCLUDED - Fujifilm X-T5 Camera, XF 16-80mm Lens, Battery, Adapter, USB Cable, Strap, Body Cap, Hot Shoe Cover, SD Card, Bag, Extra Battery, Charger, Filter Kit, Screen Protector, Cleaning Kit & More!

INCLUDED – Fujifilm X-T5 Mirrorless Camera, XF 16-80mm f/4 R OIS WR Lens, Battery, AC Adapter, USB Cable, Strap, Body Cap, Hot Shoe Cover, Lens Caps, Hood, Cloth, Fujifilm 1 Year Limited Warranty. Bundoled with 128GB SD Card, Extra Battery, 72mm Filter Kit (UV | CPL | FLD), Cleaning Kit.

Elevate Your Photography: Experience the artistry of photography with the FUJIFILM X-T50. Paired with the XF16-50MM F2.8-4.8 lens, this kit offers exceptional image quality and versatility. From vibrant landscapes to captivating portraits, unleash your creativity and capture every moment with stunning clarity and detail.
Mastering Self-Timer Functionality

Mastering the self-timer on your instant camera is a fun way to make sure everyone gets in the picture! This nifty feature gives you a ten-second delay, so you can rush into the frame and strike a pose with your friends. When you hit the self-timer button, the camera snaps a shot after seven seconds, then fires off another one three seconds later. That second shot is perfect for capturing those unexpected laughs or smiles that pop up right after the first click.
To get the best results with the self-timer, take a moment to check your lighting. If you’re outdoors on a sunny day, find some shade to avoid harsh shadows. You could also position your friends at a slight angle to the light for a more flattering look. And remember to explore different modes on your camera; some settings might help with group shots or low-light situations. With a bit of practice, you’ll be snapping photos like a pro in no time!
Once you’re comfortable with the self-timer, let’s talk about some creative angles and settings to elevate your photography even further. Using a compact photo album to organize and display your best self-timed shots can help preserve those memories beautifully.
Understanding Flash Settings

Hey there! Let’s talk about flash settings because they’re super important for capturing that perfect shot, especially when the lighting is tricky. Our Instax cameras have some really neat flash modes that make this easy. For instance, there’s the Auto mode, where the camera can sense the light in the room and decide whether you need the flash. This way, it helps you get the best exposure without any guesswork.
Then we have Red Eye mode, which is perfect for those portrait shots where you want to avoid that annoying red-eye effect. Picture this: you’re taking a photo of your best friend at a birthday party. When you switch to Red Eye mode, you can be confident that their smile looks amazing without any creepy red glare.
Low-light situations? No problem! The Forced Flash mode brightens up your subjects, even in the dark. Imagine a cozy evening at a friend’s place, and you want to capture the fun despite the dim lighting. With this mode, everyone will be perfectly lit, ready for the camera.
And if you’re at a lively event with kids running around, Party and Kids modes keep the flash on continuously. This way, you can snap every action-packed moment without missing a beat. So, whether you’re capturing memories at a party or just snapping a photo in your living room, understanding these flash settings will help you adapt and enhance your photos effortlessly. For best results, consider using ISO 800 black and white film to improve low-light performance and capture sharper images. Ready to delve into how to frame those shots perfectly?
Recommended Products

20.8MP FX-Format CMOS Sensor

SONY USA AUTHORIZED - Includes Full SONY USA WARRANTY

Unique Design: The DSLR Photo Booth features a 15.6" interactive touch screen, 256GB storage mini PC, black/white metal shell, color lights from top to bottom. It availables you instantly capture, preview, share photos online and print to classic 4"x6", 2.1"x2.1", mini label stickers or any other paper size via any printers. (The package includes the DSLR camera in 24.1 megapixel CMOS sensor but no printer)
Utilizing Macro and Close-Up Modes
Hey! If you’re into photography, you’ve got to check out how using Macro and Close-Up Modes on your Instax cameras can totally transform your shots. Macro Mode lets you get super close to your subject—like 30cm to 60cm away—which is perfect for capturing all the intricate details of flowers or tiny insects. Just imagine snapping a photo of a flower petal and seeing every little vein and texture!
When using close-up settings, remember that the aperture closes down to f/22. This often means you’ll want to use your flash in low-light situations to ensure your images are bright and vibrant. It’s all about adapting your technique; for instance, if you’re taking close-ups in a shadowy area, bumping up that flash will save the day. And if you’re into selfies, a close focus adapter can help you nail those sharp, detailed shots.
What’s really cool is how you can mix these modes with some creative settings for fun effects. So, whether you’re snapping photos of nature or experimenting with self-portraits, there’s so much you can do to make your photography pop! Speaking of creative photography, let’s explore some tips on how to compose those shots for maximum impact.
Also, keep in mind that using Instax Wide films with your camera ensures you get vibrant colors and high-quality wide shots to complement your macro photography.
Recommended Products

100 WAYS OF EXPRESSION: Stunning, evocative, dynamic. Interesting, striking, surprising. With 10 lens and 10 film effect options, you can create the exact vision you have in mind. Experiment with vivid colors, go retro, add softness to the focus or lose the color – it’s your shot, and there’s 100 ways to capture it. Take control.

100 Ways Of Expression: Stunning, evocative, dynamic. Interesting, striking, surprising. With 10 lens and 10 film effect options, you can create the exact vision you have in mind. Experiment with vivid colors, go retro, add softness to the focus or lose the color – it’s your shot, and there’s 100 ways to capture it. Take control.
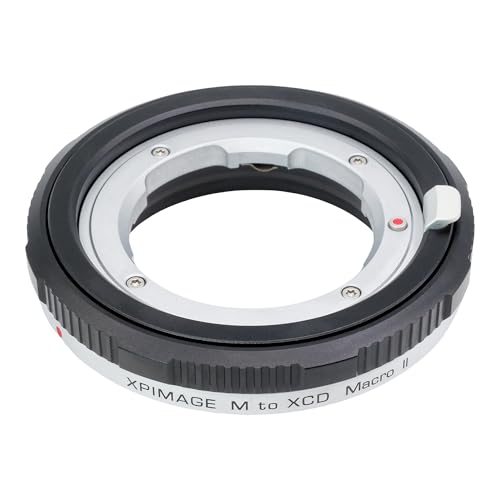
Macro Photography: Reduces minimum focusing distance with 9mm focusing travel
Experimenting With Creative Effects
Alright, let’s chat about how to up your photo game! Once you’ve figured out your Macro and Close-Up Modes, it’s the perfect time to get a bit creative with some fun effects. One simple way to experiment is with the Lighten/Darken mode. This feature lets you tweak the exposure of your shots, making sure those close-ups really shine, no matter the lighting. For example, if you’re snapping a flower in bright sunlight, you might darken it a bit to reduce glare and bring out those vibrant colors.
When you want to capture a group picture or a fun selfie, Timer mode can be a lifesaver. Just set it to a ten-second countdown, which gives you enough time to get in the frame and say cheese! It really helps in avoiding that awkward moment when someone is just about to move and ruin the shot.
And let’s not forget about the Macro mode; it’s perfect for capturing those intricate details that often get overlooked. Think about zooming in on the dew on a leaf or the texture of a petal. Playing with the four Flash Modes on your instant camera is also key. Depending on whether you’re in a cozy café or outside at dusk, you can adjust the flash to suit your environment, giving your photos that little extra edge.
Experimenting with these settings alongside built-in film effects and filters can truly elevate your photography and allow more personalized creative expression. These tools open up so many creative possibilities! Next, let’s look at some tips for composition that can really enhance your shots.
Frequently Asked Questions
What Do the Settings on the Instax Camera Mean?
The settings on our Instax camera define exposure settings, focus modes, and flash options. They help us enhance image quality, adjust light, and balance colors for portraits and landscapes, plus it even includes a timer function!
What Are the 5 Basic Camera Settings?
The five basic camera settings are exposure adjustments, flash modes, shutter speed, macro mode, and timer mode. Let’s explore them, incorporating exposure triangle basics, ISO, aperture effects, and focus modes for creative photography.
How to Get the Best Quality Photos From Instax?
To capture stunning Instax photos, we’ve got to embrace photo lighting tips, apply flash usage advice wisely, and master focus adjustments, while also paying attention to background choices and lens cleaning techniques for the best results.
Is SX-70 Film Better Than 600?
SX-70 film isn’t necessarily better than 600; it depends on our artistic preferences. While SX-70 offers unique color palettes and detail, 600 provides sharper images and better light sensitivity for varied exposure situations.