As an Amazon Associate, we earn from qualifying purchases. Some links on this site are affiliate links at no extra cost to you. Our recommendations are based on thorough research and editorial judgment.

Shooting Portraits With Instant Cameras: Distance and Framing Tips
When shooting portraits with instant cameras, we should consider distance and framing carefully for sharp results. Standing about 0.6 meters away helps avoid distortion, especially with standard lenses. Using the rule of thirds keeps our subjects engaging and well-composed. Simple backgrounds enhance focus on the subject, while natural light minimizes unflattering shadows. Varying angles can create unique perspectives. By applying these tips, we can elevate our portraits. Stick around for more specifics on composition and lighting!
Key Takeaways
- Maintain a shooting distance of 0.6 meters to avoid distortion and achieve clarity in portraits with instant cameras.
- Use the rule of thirds to position your subject off-center for visually interesting compositions.
- Opt for simple, uncluttered backgrounds to ensure your subject stands out without distractions.
- Take advantage of natural light, positioning subjects in shade or during golden hour to avoid harsh shadows.
- Experiment with different angles, framing techniques, and foreground elements to add depth and creativity to your portraits.
Understanding Autofocus Distance

You may be interested


Hey, you know when you’re snapping those instant portrait photos with cameras like the Polaroid Now or Now+? It’s super important to get a grasp on autofocus distance. These cameras have neat autofocus systems that use a special Portrait Lens for really close-up shots (think 0.3m to 0.6m) and a Standard Lens that covers everything from 0.6m to infinity for those farther away subjects. This means you can get some great shots no matter how close or far your subject is!
Now, if you’re using the Polaroid Go, things change a bit because it has a fixed lens. That means you gotta stay at least 30 cm away to keep everything nice and sharp. If you wander too close, your photos might turn into a blurry mess, which we definitely don’t want! So, when you’re out with friends or at an event, just remember: keep your distance in mind to capture those clear and vibrant moments.
Understanding autofocus distance can really make a difference in how your portraits turn out. Whether it’s a fun group shot or a heartfelt close-up, knowing these little tips can help you snap some fantastic memories that really showcase the spirit of your subjects. What’s next? Let’s chat about lighting and how it can take your photos to the next level! Plus, using instant cameras with high-quality image resolution ensures that your portraits are vivid and detailed for lasting memories.
Fixed Lens Focus Guidelines

Taking portraits with fixed lens instant cameras, like the Polaroid Go, is such a fun way to capture moments! Understanding the focus guidelines makes it even better. These cameras have a minimum focusing distance of 30 cm, which means you can take clear, vibrant portraits without getting too close and overwhelming your subject.
Getting too close can lead to distortion or a blurry image because of how the fixed lens works. So, it’s key to maintain that proper distance. For instance, try standing about an arm’s length away to see how the portrait turns out. This distance not only helps with clarity, but it also gives you room to play around with angles to find what makes your subject look best.
As you frame your shot, think about balancing your subject in the space—fill the frame with them while still giving a hint of the background for context. With a little practice, you’ll start to feel more comfortable and confident in creating portraits that really showcase personality and emotion. Next up, let’s explore some tips for capturing those unique backgrounds!
For optimal portrait quality with instant cameras, understanding the ISO and sensitivity of the film you use can greatly enhance color vibrancy and detail in your shots.
Recommended Products

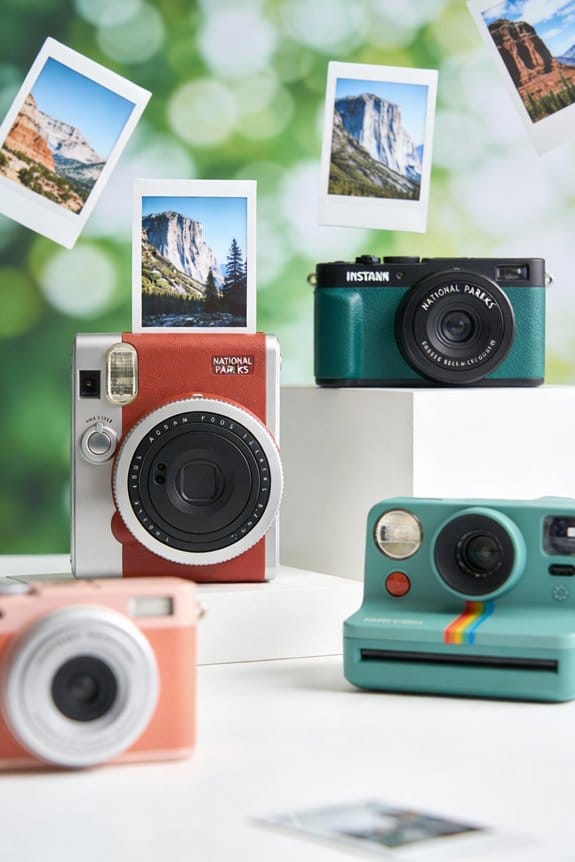
For Instax mini instant cameras

INSTAX COMPATIBILITY: Use our film with your Fujifilm Instax Mini cameras including the Mini 12, Mini 11, Mini 9, Mini 8, Mini 7+, Mini 40, Mini SP-2, Mini Link, Mini 90, Mini 70, Mini 40, Mini Hello Kitty, Polaroid PIC 300 and other Instant Film Cameras!
MINI FILM ONLY COMPATIBLE WITH POLAROID GO: The Polaroid Go only uses Polaroid Go format films. The same Polaroid you know and love, only smaller. Go Film is not compatible with full size Polaroid I-Type Now Cameras
Importance of Framing Your Subject
Framing your subject in a portrait is just as crucial as nailing the focus, especially when you’re using an instant camera. When you frame your subject well, it naturally pulls the viewer’s eye to the most important parts of your Polaroid shots. For instance, instead of putting your subject right in the center, try applying the rule of thirds—think of it like drawing a tic-tac-toe grid on your photo. Placing your subject off-center can make the image more interesting and alive.
It’s also important to maintain a good distance from your subject, usually around 0.6 meters to infinity. Standing too close can distort your photos, which is something you definitely want to avoid. Make sure to keep an eye on that viewfinder, as it can sometimes mislead you about the edges. Adjustments might be necessary—shift your subject slightly away from the frame’s edge to prevent unintentional cropping.
Experimenting with various distances can be a game of trial and error, but it’s worth it when you find that perfect spot where your subject fills the frame just right. The right framing doesn’t just enhance the portrait; it enriches the whole experience of looking at the photo. When you’re conscious about these details, you start to create compositions that not only capture a moment but also tell a story. To preserve these precious moments effectively, consider using instant camera scrapbooks with acid-free pages for long-term photo protection.
Recommended Products

Effortless Application: This no-mess double-sided tape runner glides on smoothly without clumps or wrinkles, with zero drying time—unlike glue—so you get instant, clean, and precise bonding

328 ft ULTRA-LONG ADHESIVE TAPE SET – Each double sided tape roller gives you 65.62 ft of clear tape; 5-pack totals 328 ft—more yards per dollar, so your scrapbooking, gift-wrapping and craft marathons keep rolling without running out

Effortless Application: This no-mess double-sided tape runner glides on smoothly without clumps or wrinkles, with zero drying time—unlike glue—so you get instant, clean, and precise bonding
Keeping Backgrounds Simple
Hey there! You know, a simple background can really take your portraits to the next level. It helps the subject stand out without all those distractions pulling away our attention. When we’re picking a background, look for something that complements the person you’re photographing. For example, if you’re shooting someone in a bright outfit, a muted backdrop can really make that outfit pop.
Using depth of field is another neat trick; by blurring any distracting elements behind your subject, you create a cleaner, more polished look. Think about using a textured wall or a gently patterned fabric that adds a bit of interest without being overpowering. You definitely want to avoid busy scenes—those can completely draw the eye away from the person you’re capturing.
Also, consider the mood you want to convey. If you’re going for a peaceful vibe, a calm natural landscape works wonders, while an urban setting can showcase a more vibrant personality. By keeping the background simple, you really highlight your subject’s features, which helps create a compelling image. And that brings us perfectly to the next topic—how to choose the right lighting to enhance those features even further! Choosing film with a high-speed ISO rating like ISO 800 film speed can also help your portraits appear vibrant and sharp, especially in natural light.
Using Natural Light Effectively
You know, when it comes to taking fabulous portraits, using natural light really makes a difference! It’s all about how you position your subjects. Try placing them with the light behind them or off to the side. This way, you can dodge those harsh shadows and avoid any blown-out highlights that can ruin a great shot.
One of my favorite times to shoot is during the golden hour—right after sunrise or just before sunset. The lighting is so soft and warm, it really brings out the best in your subjects. For example, if you’re capturing someone laughing in a park during that time, the light will wrap around them beautifully! On the flip side, steer clear of that bright, midday sun; it tends to create unflattering contrasts. Instead, seek out shady spots or take advantage of overcast days—your photos will have a more even glow.
Oh, and when you’re using standard lenses, try to maintain a distance of about 0.6 meters. This not only helps you achieve clarity and depth but also prevents distortion. Also, using color filters designed for instant cameras can add creative and vibrant effects to your portraits. So, mastering the use of natural light can really elevate your portrait game! Next, let’s talk about how to frame your subjects for those perfect shots.
Recommended Products

UV protection filter for general, everyday use

【Introducing NEEWER BASICS】 Simple and practical, NEEWER BASICS is an economical product line that focuses on essential functions and designs, without unnecessary extras and materials. NEEWER FL10 is a portable photography flashlight for atmosphere. Measuring 6.1"x2.1" (155x53.5mm) and weighing just 0.92lb (416g), it is made from aluminum alloy for a sturdy yet lightweight design. Its compact size with a textured handle allows for a comfortable single hand grip, making it easy to use handheld

The Role of Composition in Portraits
Hey there! Let’s talk about the role of composition in creating stunning portraits. Composition really matters because it can make or break a photo’s appeal. For instance, if you position your subject off-center, using the rule of thirds, it naturally draws the viewer’s eye without feeling chaotic. You know, that little trick can make a big difference.
One thing to keep in mind is the background. A clean background is crucial—it keeps all the attention on your subject. Imagine taking a portrait on a busy street; the distractions can really pull focus away. Instead, try shooting in a simple location or use a wide aperture to create a beautiful blur behind your subject. It’s like crafting a scene where your subject shines!
Also, don’t forget about angles! Shooting from just above eye level can create a softer, more flattering perspective. It can make your subject look more engaging—like how a slight tilt can switch up the mood just enough. And adding some foreground elements can create depth in your image, making it feel more inviting. Think about a flower or a hand reaching into the frame; it draws the eye in and adds layers to your shot.
Lastly, light is your best friend. Natural light can transform even the simplest composition into something magical. Remember that exposure and lighting conditions significantly impact the final instant photograph, so shooting in bright light or using flash can enhance your portraits. So, the next time you’re planning a portrait, remember how these composition techniques can elevate your work. It’s all about making choices that showcase your subject perfectly! Ready to grab your camera and give it a go?
Exploring Different Perspectives
You know, capturing portraits with instant cameras really opens up so many creative doors! For the best results, try to keep your distance between 0.6 to 1.2 meters from your subject. This range helps you focus nicely on them without losing any detail. Take a moment to move around a bit—just shifting slightly to the left or right can uncover some truly unique angles that make your photos pop.
Another fun trick is to use the rule of thirds. Imagine breaking your frame into a three-by-three grid, and position your subject off-center. It creates a more captivating image! You can also add something in the foreground—like a plant or an interesting object—to frame your subject and add dimension.
And don’t forget about your shooting height! Changing from waist level to shooting from overhead can drastically change the vibe of your portrait. For example, an overhead shot might feel more playful, while a lower angle can add a sense of power or intimacy. With these simple techniques, you’ll elevate your instant photography, creating portraits that truly tell a story. So, let’s keep experimenting and see what amazing moments we can capture! Remember that features like auto exposure can help optimize your portraits in varying lighting conditions when using instant cameras.
Adjusting Distances for Optimal Results
If you want to get the best results with your instant camera, paying attention to your shooting distance is key. For those crisp portraits that really capture your subject’s essence, try to stick to about 0.3 meters away. This allows the camera’s autofocus to do its job, making those details pop. On the other hand, if you’re going for a broader shot with a group of friends, stepping back to around 0.6 meters can work wonders.
Framing your shots can make a huge difference too. Instead of centering your subject directly, try positioning them slightly off to one side. This small adjustment can help offset any misalignment in the viewfinder, making your photo feel more dynamic. Filling the frame is also important—get close enough to ensure your subject stands out, but leave a little extra space around them to keep distracting backgrounds at bay. And remember the rule of thirds: by placing your subject along those grid lines, you’ll create a more interesting portrait. Also, choosing film with a higher ISO rating like 800 can help ensure vibrant colors and clear skin tones are captured in your portraits.
Recommended Products

Updated Classic- The classic Polaroid film is back with a new formula exclusively for I-Type cameras with 40 classic iconic white framed photos.

48 Photo Bulk Pack- Our classic Polaroid film is back with a new formula exclusively for I-Type cameras with 48 classic iconic white framed photos.

Enhancing Portraits With Color and Texture
So, once we’ve figured out the shooting distances and how to frame our portrait, let’s chat about how we can really enhance those portraits with color and texture. Using vibrant colors can make a real emotional connection with viewers. For example, if we place our subject against a bright yellow wall or have them wear a bold red shirt, it instantly lifts the entire vibe of the shot.
Textures play a key role too! Think about shooting against something like a rough, brick wall or surrounded by lush green plants. Those textures don’t just look great; they add depth and richness, helping your subject shine. If we use contrasting colors, like a bright subject in a darker background, that striking combination draws the viewer’s eye right to them. And don’t forget the subject’s clothing—fabrics like a cozy knit sweater or silky dress bring extra layers of interest that can make a difference.
Also, keep in mind how seasonal colors can affect the mood. For instance, warm oranges and browns work wonders in fall, while spring is a fantastic time for those light pastel shades that bring a soft, fresh feel. These details can truly elevate your portraits, leading us perfectly into how lighting can further shape the look and feel of your images. Using cameras equipped with Zink Zero Ink technology can help bring out those colors vividly and instantly when printing your portraits.
Frequently Asked Questions
What Is the 20 60 20 Rule in Photography?
The 20 60 20 rule in photography guides us in composition styles, balancing our frame with 20% foreground, 60% subject, and 20% background. We can enhance lighting techniques and storytelling this way, creating engaging images.
What Is the Rule of 3 in Portrait?
The Rule of 3 in portrait photography emphasizes using composition techniques to align our subject along grid lines. Incorporating lighting basics, we can create engaging images that draw the viewer’s eye toward our focal point.
What Is the Ideal Distance for Portraits?
Did you know that 65% of great portraits come from the right distance? For portraits, we should aim for 0.6 to 1.2 meters, and keep in mind some helpful framing tips to enhance our composition.
How to Make Your Instax Pictures Better?
To make our Instax pictures better, we should experiment with lighting techniques and adjust our camera settings. Natural light works wonders, and by playing with angles, we can capture vibrant, engaging moments that truly shine.