As an Amazon Associate, we earn from qualifying purchases. Some links on this site are affiliate links at no extra cost to you. Our recommendations are based on thorough research and editorial judgment.
Night Photography Challenges With Instant Film
When we explore night photography with instant film, we encounter unique challenges. Instant film often struggles with low light sensitivity and capturing vibrant nighttime colors. The slower shutter speeds required for detail can lead to motion blur without stable support. We also need to be mindful of flash overexposure and ambient light balance. With careful adjustment of camera settings and strategic composition, we can overcome these hurdles. Keep going to uncover tips for enhancing your night shots!
Key Takeaways
- Instant film may struggle to accurately capture the rich hues of nighttime scenes.
- Longer exposure times are necessary for greater detail, posing challenges for instant film.
- Tripods are essential to prevent motion blur during the longer exposures required at night.
- Built-in flashes can wash out details in instant film photos, affecting overall image quality.
- Light painting techniques may yield unsatisfactory results due to instant film’s limitations in low light.
Understanding the Unique Challenges of Night Photography

You may be interested


Night photography can be a bit tricky, but that’s what makes it such an exciting adventure! When you’re out there in low light, you might notice that your instant film doesn’t quite capture all those beautiful nighttime hues. That’s why longer exposure times are key—and that’s where a tripod comes in handy. For instance, if you set your camera to bulb mode, you can capture stunning details with exposures lasting up to 30 seconds, but you’ll definitely want to ensure your camera is steady to avoid any blur.
Now, built-in flashes can help light up your subjects, but be careful with how far away you are. If you’re too close, you might accidentally wash out the details in your shot. Have you ever tried light painting? It’s a fun technique where you use a light source (like a flashlight or sparkler) to “paint” with light during a long exposure, resulting in some amazing and unique images.
Ultimately, getting the hang of night photography is all about experimentation and knowing your camera settings inside and out. So grab your tripod, practice a bit, and you’ll be on your way to creating some truly mesmerizing night shots! And once you get the basics down, we can explore some cool post-processing techniques to make those images pop even more. To keep those shots perfect, it’s also essential to maintain a dust-free lens using tools like a blower brush to avoid any debris ruining your night photos.
Camera Settings for Low-Light Conditions

Hey there! So, when it comes to low-light photography, adjusting your camera settings is super important for capturing those quality images. For starters, think about your aperture. If you use a small aperture, you’re letting in less light, which can make your photos darker. That’s where a sturdy tripod becomes your best friend, especially when you’re dealing with longer exposure times. It helps keep everything sharp and clear.
Also, don’t underestimate the power of your flash! Position it just right to maintain clarity in your subjects without washing them out. A good rule of thumb is to keep it within a few feet of your subject. And if you want to experiment a little, consider using colored gels on your flash. They can add some fun pops of color and really make your photos stand out.
Finally, keep an eye on exposure compensation. It’s a handy tool for balancing brightness if you have both distant and nearby subjects in your shot. By mastering these simple camera settings, you’ll find that low-light situations become an exciting challenge rather than a hindrance. Ready to explore more tips for capturing the perfect shot? Adding durable acid-free materials such as photo corner stickers can also help protect your instant film photos from wear and fading over time.
Recommended Products
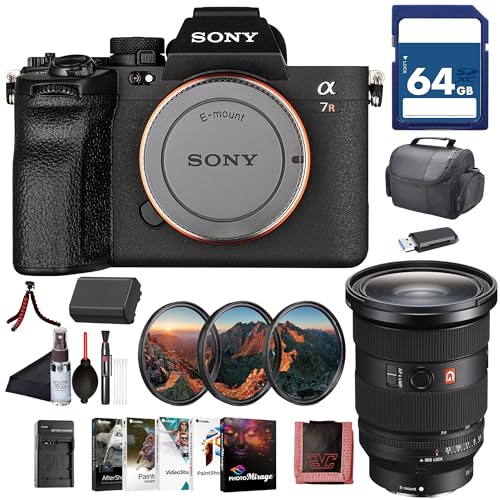
Sony USA Authorized. Bundle Includes: Sony a7R V Mirrorless Camera + Sony FE 24-70mm f/2.8 GM II Lens (Sony E), 64GB Memory Card, 3 Piece Filter Kit, Photo Software, Soft Bag, NP-FZ100 Battery, NP-FZ100 Charger, Memory Card Reader, Flexible Tripod, Memory Card Wallet, Cleaning Kit

Sony USA Authorized. Bundle Includes: Sony a7R V Mirrorless Camera + Sony FE 200-600mm f/5.6-6.3 G OSS Lens, 64GB Memory Card, 3 Piece Filter Kit, Photo Software, Soft Bag, NP-FZ100 Battery, NP-FZ100 Charger, Memory Card Reader, Flexible Tripod, Memory Card Wallet, Cleaning Kit
Bundle Items Include:Nikon Z8 Professional Full Frame Mirrorless 8K Video & Stills Hybrid FX Camera, Nikon NIKKOR Z 180-600mm f/5.6-6.3 VR Lens (Nikon Z), 64GB Memory Card, EN-EL15c Replacement Battery, External Battery Charger, Soft Bag, Photo Editing Software, Memory Card Reader, 3 Piece Filter Kit, 12" Flexible Tripod, Cleaning Kit, Memory Card Wallet, Hand Strap, Lens Cap Keeper
Utilizing Bulb Mode for Extended Exposure

If you’re looking to capture stunning images in low light, using bulb mode can really elevate your photography game. This feature allows you to take control of how long the shutter is open, letting you keep it open for more than 30 seconds if you want! To make the most of this, a sturdy tripod is a must.
Imagine you’re out at night with a beautiful city skyline in front of you. With bulb mode, you can highlight just a few buildings with a flash while still capturing the glow of the lights around them. You could also try light painting—just wave a flashlight or sparkler around during your shot to create unique, eye-catching effects.
However, it’s important to remember that keeping an eye on your surroundings is essential, as light conditions can change quickly. Once you get the hang of bulb mode, it opens up a whole new world for nighttime photography, making it easier to create striking images in the dark. So, let’s get ready for your next adventure! Using an instant camera hobby binder with archival-safe materials is a great way to preserve and organize your night photography prints.
Recommended Products

【Spotlight Effect Snoot Attachment Kit】 The NEEWER LS-39 conical snoot kit is a versatile light modifier tool in photography and filmmaking, enabling precise and dramatic spotlight effects, including subject highlighting, vibrant scene colors, and intriguing patterns. It empowers users to elevate compositions, evoke moods, and unlock visual possibilities for various applications. Weighing just 4.6lb/2.1kg, it's highly portable with the included carrying bag

【Complete Photography Studio Kit】: It includes one 9.8ft x 9.8ft green backdrop, one 9.8ft x 8.5ft background stand support system, six backdrop clamps, two 45W LED bulbs, two 24” x 24” softboxes, one 19” panel light with remote control, three adjustable 6.56ft light stands, and one carry bag for easy storage and transport.

【Spotlight Projector Attachment】The optical snoot allows for light to be more gathered and is equipped with a 40° professional projection lens for a much brighter light compared to the bare light. Different light effects are realized by adjusting the focus, the light can be adjusted between blur and sharp, and the image clarity can be adjusted by adjusting the focus fixing knob to stretch the imaging lens forward or backward. It can give you a better projection of light.
The Role of Tripods in Night Photography
If you want to capture jaw-dropping nighttime photos, a good tripod is your best friend. Seriously, stability is everything when you’re shooting in low light. Long exposure shots need slower shutter speeds to let in more light, and a tripod helps eliminate any camera shake. When you’re in bulb mode, a sturdy tripod lets you play around with extended exposures without worrying about motion blur, opening doors for some really cool artistic effects.
Another benefit of using a tripod is how it allows you to focus on your composition. When you’re light painting, for example, a tripod keeps your camera steady, ensuring consistent framing even as you move around with your light source. Plus, most tripods can be adjusted to find that sweet spot in height and angle for your particular shot.
In the challenging lighting conditions of the night, having a tripod in your gear bag really boosts your chances of getting sharp, well-exposed images. It’s one simple piece of equipment that can make a big difference in the quality of your night photography. From here, let’s explore some common camera settings and techniques to use when shooting at night!
Choosing a tripod with adjustable height and strong stability features can provide the versatility needed for different shooting angles during night photography.
Recommended Products

SUPERIOR OPTICS - Features a Schmidt-Cassegrain optical design with a large 11-inch aperture, providing exceptional light-gathering ability for bright, detailed views of celestial objects.

Computerized GoTo mount with high-performance worm gears and motors for improvedtracking accuracy, along with reduced gear backlash

G Master design combines extraordinary sharpness and smooth bokeh, Constant F2.8 max aperture maintain exposure and depth of field. Weight 1480 g (without tripod mount)
Managing Light Sources: Flash vs. Ambient Light
Hey, have you ever tried to snap some stunning night photos? It’s all about managing your light sources! You want to balance the power of flash with the beauty of ambient light. Flash is great for highlighting your subjects, but if you get too close or too far, you can end up with an overexposed photo that loses all detail. On the other hand, ambient light brings a softer, more natural vibe, but you’ll often need a longer exposure and a steady hand—this is where a tripod comes in handy.
One neat trick is to play with exposure compensation, which is like adjusting the brightness on your camera to blend those different light sources smoothly. If you’re using flash, adding color gels can also give your shots a fun pop of color, making your images really stand out. For instance, try shooting a portrait with a bit of ambient light in the background and the flash illuminating your subject’s face—it creates a beautiful contrast!
And don’t forget about bulb mode! This setting lets you keep the shutter open for as long as you want, which can be perfect when you’re trying to capture those intriguing contrasts of light at night. It’s all about experimenting and finding what works best for your style. Speaking of which, let’s chat about the importance of planning your shots based on the lighting conditions you have!
Using a fill light with adjustable brightness and color temperature can also greatly improve your night portraits by reducing harsh shadows and enhancing color accuracy.
Recommended Products

Westcott FJ400 400Ws Strobe with AC/DC Battery 2-Light Backpack Kit

【Wide Application】With 117cm Length(46 inch), TL120 tube light is longer and more powerful. What's great with TL series rgb tube light is that they can be everywhere, in any forms! To throw some as glaring background practicals, to sketch beautiful rims by single set, or even create powerful arrays by stacking tubes.Time to bring your creativity to the next level production with Godox TL120.
【Programming Power Mode & Vehicle Display Mode】The EM365 is designed to provide a stable voltage under varying loads during major vehicle ECU reprogramming and diagnostic work. Programming power supplies supply current up to 150A, voltage range 10.8-16V. The display mode will output uninterruptible power supply and restart automatically in case of power failure, providing stable power support during vehicle display and battery replacement in the showroom.
Creative Techniques: Layering Images and Light Painting
Hey, have you ever thought about how layering images and light painting can make your night photography pop? These creative techniques are not just for the pros; they can really add an exciting twist to your photos. When you’re using instant cameras, you can take advantage of the MX button to create multiple exposures. It’s pretty simple: shoot a darker image first, then follow it up with a lighter one. This way, you’ll get a striking contrast that grabs attention!
Now, let’s talk about light painting. To do this right, you’ll need a tripod and some creative light sources, like LED flashlights or glow sticks. By using long exposure settings on your camera, you can capture beautiful trails of light as they move. Imagine writing your name in the air at night—that’s exactly the kind of cool effect you can create!
If you want to take it a step further, consider adding a Splitzer lens attachment for unique framing while you layer your images. It helps you mix up your shots even more. Just experiment with different light sources and timing to find what resonates with your style. Overall, these techniques really turn your night photography into something dynamic and personal. Ready to get creative with your next shot? Remember to consider the development time of your instant film to ensure your images come out perfectly clear.
Importance of Composition in Low Light
Hey there! When it comes to nighttime photography, understanding composition is super important, especially since the light is often limited. In low light, it’s easy for distracting elements to steal attention from your main subject, which is why thoughtful framing is essential. For instance, if you’re shooting a city skyline, try to include some leading lines—like streets or pathways—that draw the eye toward the buildings.
Let’s not forget the rule of thirds! Placing important elements along those imaginary lines can help create a more balanced photo and keep it visually appealing. Also, consider adding some foreground elements, like silhouettes of trees or people, to give your image depth. This can really help combat that flat look that sometimes happens with low-light scenery.
And speaking of making your subject pop, playing with negative space is a fantastic technique. By allowing some darker areas around your subject, like a brightly lit streetlamp against a dark sky, you can create a striking contrast that captures attention. These tips will definitely help take your night photography to the next level, making those evening shots truly stand out! Ready to explore more techniques? Let’s dive into the art of long exposures next!
For a creative touch, adding glitter glue decorations can personalize your instant photos and make your night shots even more eye-catching.
Tips for Capturing Movement in Night Scenes
Capturing movement in night scenes can really turn those fleeting moments into something truly stunning. One of the best ways to do this is by using bulb mode on your camera, which lets you take long exposures. This is great for creating those eye-catching light trails you often see in night photography, like the streaks from car headlights as they zoom by. Just make sure you have a sturdy tripod to keep your shots sharp; no one wants a blurry image when you’re trying to highlight motion!
Another fun technique is to experiment with multiple exposures. If you’re using an instant film camera, look for the MX button. It allows you to layer images, adding depth and a sense of movement to your photos. Also, don’t forget to consider flash distance; adjusting it can show your moving subjects more clearly. For instance, if you’re at a concert, a properly set flash can help capture a dancer in motion without washing out the scene.
Lastly, when you’re panning your camera in the direction of the subject’s movement while using slow shutter speeds, you create a beautiful blur. This gives the impression of speed and action, like capturing a skateboarder flying past you in a park at night. By using these techniques, you can really bring the dynamic energy of night photography to life, especially on instant film! Keep in mind that development time for instant films can vary from 6 to 15 minutes, so be patient as your images slowly appear. Now that you’ve got these movement tips down, let’s explore how to play with light and shadows in your night shots.
Recommended Products

Exceptional Performance: The SWAROVSKI OPTIK NL Pure 10x52 Binoculars has exceptional twilight performance thanks to a 52 mm objective lens diameter
TRUE MULTISPECTRAL BINOCULARS FOR ANY LIGHT CONDITION — Seamlessly switch between 4K Day, IR Night, Thermal, and Twilight modes to maintain constant situational awareness from sunrise to complete darkness.

Bundle Includes: 1 x Canon PowerShot G7 X Mark II Digital Camera, 1 x SanDisk 64GB Extreme PRO Cmemory Card, 1 x Memory Card Reader, 1 x Soft Medium Camera and Video Case Bag, 1 x 12 inch Flexible Tripod, 1 x Hand Strap, 1 x Memory Card Wallet, 1 x Cleaning Kit
Post-Processing Your Night Shots
Hey there! Let’s chat about post-processing our night shots because it really makes a difference in how they turn out. You know those low-light conditions that can make our photos look a bit dull? Well, tweaking the brightness and contrast can really help bring them back to life. For instance, if you snap a shot of the city skyline at night, you can adjust those settings to make the lights pop against the dark sky.
Another cool tool to consider is the Polaroid Lab. You can use it to scan your instant photos and edit their digital versions for better color balance and clarity. Picture this: after a night out, you have a slightly blurry photo of friends under twinkling lights, and a quick filter application enhances those vibrant hues, transforming that casual snap into something memorable.
Also, don’t underestimate the power of cropping and straightening! If your shot feels a bit off, a simple crop can bring the focus right back to what matters. And if you’re feeling creative, playing around with layering techniques in your editing software can lead to really unique effects, like overlaying your city view with a textured pattern.
When selecting film for night photography, consider the ISO rating as it significantly affects the vibrancy and clarity of photos captured in low-light environments.
Showcasing Your Best Night Photography
Capturing stunning night photography is all about technique and a little bit of fun! First off, using a tripod is essential. It keeps your camera steady during those long exposures, which is crucial for getting sharp images in low light. Imagine trying to photograph a city skyline at night; without a tripod, those lights might turn into blurry streaks!
Have you ever played around with bulb mode? It’s a fantastic way to create amazing light trails. For instance, if you set your camera up along a busy street, you can capture the movement of cars zooming by, leaving behind colorful trails of light. And don’t underestimate the power of the flash! Adjusting the exposure compensation can help prevent overexposed spots, allowing you to reveal more detail in your night shots.
Another fun idea is layering your images. You might take several shots of the same scene at different exposures to combine darker and lighter elements later in editing. This technique can really enhance depth and interest in your photos. Oh, and if you’re feeling adventurous, try adding color gels to your flash for a pop of color! This can turn an ordinary scene into something eye-catching and vibrant.
With these practical tips, you’ll find that night photography can be an exciting way to tell a story with your images. Next up, let’s discuss some popular locations for capturing those memorable night shots! Using instant films like the Fujifilm Instax Mini Film can add a unique analog texture and vibrant color to your night photography.
Frequently Asked Questions
What Is the 500 Rule for Night Photography?
The 500 Rule helps us determine ideal exposure settings for night photography by dividing 500 by our lens’s focal length in mm. This way, we capture stunning, sharp stars without motion blur during our night shoots.
What Are the Challenges of Night Photography?
Oh, night photography’s a walk in the park—if that park’s in pitch darkness! We often grapple with tricky exposure settings, unstable shots, and the unpredictable dance of artificial lights. It’s challenging, yet creatively rewarding!
How to Take Photos at Night With Film?
To take photos at night with film, we can use bulb mode for longer exposures, a tripod for stability, and experiment with light painting. Together, we’ll create stunning images that capture the magic of nighttime!
What Is the 20 60 20 Rule in Photography?
The 20-60-20 rule in photography suggests that we’ll capture 20% great photos, 60% average ones, and 20% less successful shots. In this, exposure compensation helps us refine our images for better results across that spectrum.