As an Amazon Associate, we earn from qualifying purchases. Some links on this site are affiliate links at no extra cost to you. Our recommendations are based on thorough research and editorial judgment.

Indoor Photography Tips for Instant Camera Users
When we shoot indoors with the Polaroid 600, we should focus on lighting and backdrops. Opening blinds for natural light reduces shadows, while bright, light-colored props enhance image vibrancy. Utilizing the built-in flash can limit blurry photos, especially in low-light conditions. Adjusting camera settings like exposure and framing can improve clarity, too. Practice is key! To explore more tips and tricks that elevate our instant photography, let’s keep uncovering techniques together.
Key Takeaways
- Maximize natural light by positioning subjects near windows and keeping blinds open to reduce shadows and enhance image clarity.
- Use light-colored backdrops and pastel props to reflect light, creating vibrant and inviting indoor photographs.
- Utilize your Polaroid 600 Flash effectively by ensuring subjects are around four feet away and using the flash shutter button consistently.
- Experiment with different angles and distances to improve sharpness, especially in low light, and stabilize your camera to avoid shake.
- Engage with local photography communities to gain insights, share experiences, and receive constructive feedback on your work.
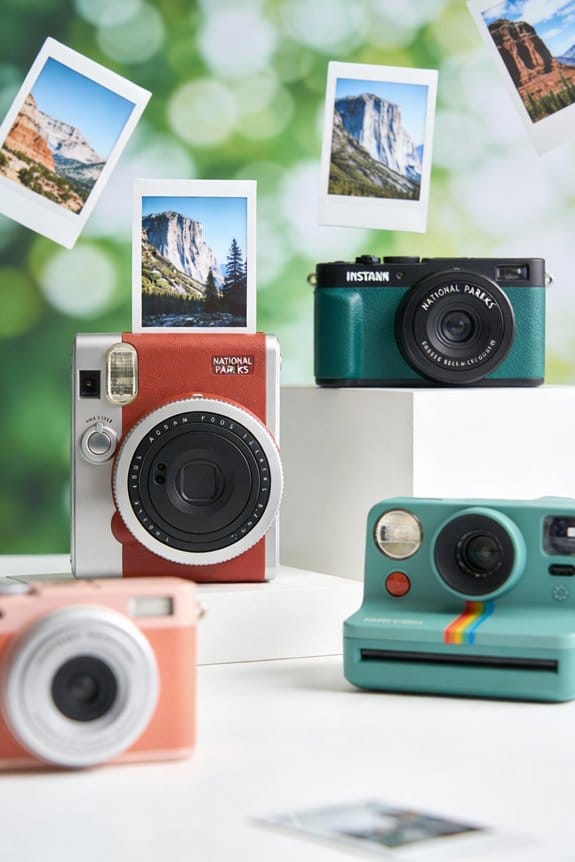
Understanding Your Polaroid 600 Camera

You may be interested


Hey! Have you ever used a Polaroid 600 camera? It’s such a fun way to capture moments on the spot. What really sets this camera apart is how simple and charming it is. With its fixed focus lens, you’ll get sharp images, especially if your subjects are around 4 feet away. So, when you’re out with friends, focus on that group shot at just the right distance, and you’ll see the clarity!
One of the best things about the Polaroid 600 is how it performs in natural light. That’s when those vibrant colors truly pop! Just remember, it works best with Polaroid 600 or i-Type film. If you try taking photos in low-light settings, you might end up with disappointing results—things can get pretty grainy. So, always aim for bright, sunny spots, like the park in the afternoon or a cozy café with large windows.
With some practice and attention to detail, you’ll really get the hang of this classic camera style. It’s all about understanding how it works in different environments. Proper light management is key to getting the best shots with your instant film. Now, let’s talk about how to frame your shots for the best results!
Mastering the Polaroid 600 Flash

Hey there! If you’re looking to master the Polaroid 600 flash, you’re in for a treat. This camera really brings your instant photography to life, but there are a few tricks to get the best results. For instance, try positioning your subjects about four feet away from a light-colored background. This simple setup can help create gorgeous, soft lighting without those annoying harsh shadows that can ruin a shot.
Now, when you’re snapping away, it’s a good idea to angle the camera slightly downward. This technique can help minimize glare that often occurs with flash photography. Also, don’t forget about the dedicated flash shutter button—it ensures your flash fires consistently, especially when you’re in dim lighting. If you’re indoors and want to balance the flash with the ambient light, play around with the flash intensity. It’s all about finding that sweet spot. To further enhance your photos, consider using instant camera rainbow film that provides vivid colors and creative borders to make your indoor shots pop.
Shooting Without the Flash

Shooting without the flash can really bring your photography to life, especially when you take advantage of natural light. Think about positioning your subjects close to a window—that way, you get fantastic exposure without the harshness of a flash, which can easily wash out colors in a photo. For instance, if you’re shooting a portrait, angle your subject so that the light falls beautifully on their face while keeping the background slightly darker.
It’s super important to experiment with how far you are from your subject and how you frame your shots. Since you might be working with a fixed focus lens, a little adjustment can make a big difference in sharpness. If you notice that your camera tends to shake in lower light, using a tripod can really help keep everything steady.
Also, don’t overlook the beauty of cloudy days! The soft, diffused light they offer can create wonderful, even tones for your images. So, next time you’re inside or it’s daylight outside, take advantage of that natural light—it can make those low-light challenges feel much more manageable. Speaking of light, let’s chat about how to set up your scenes for the best effect!
When natural light isn’t enough, consider using portable selfie ring lights to add adjustable brightness without the harshness of a flash.
Avoiding Blurry, Dark Photos
Hey! So, if you want to avoid blurry, dark photos, there are some super helpful tips I can share with you. First off, don’t hesitate to use your built-in flash, especially when you’re in low-light situations. It can really help keep your shots sharp and clear. Think about when you’re at a party or a dimly lit restaurant—just a quick flick of that flash can save the moment!
Another great trick is to stabilize your camera. If you have a tripod, definitely use it. If not, just rest your camera on a solid surface like a table or a ledge. It makes a huge difference in reducing shake, especially in those moments when you’re trying to capture a quick shot of someone laughing.
Keep your subjects close, too—ideally within about 4 feet of your lens. This way, you’ll get the best focus and exposure. And don’t forget to adjust your exposure settings! If you notice your photos are too dark, give it a little bump up to brighten things up. Playing around with these settings can help you find that sweet spot.
Lastly, always aim for consistent lighting. Natural light is your best friend, but if you’re relying on flash, try to angle it so you don’t create those annoying harsh shadows. This little tweak can really enhance the clarity of your photos. Once you get the hang of it, you’ll be snapping great pictures in no time! Ready to try it out?
Also, keeping your camera’s lens clean with a specialized cleaning kit can greatly improve your photo quality and reduce unwanted spots or blurs.
Tips for Shooting Polaroid Indoors
Hey there! If you’re looking to capture some perfect Polaroid shots indoors, getting the lighting just right is key. Try to place your subjects near windows or other natural light sources because those instant film cameras really shine in soft, diffused light. A great tip is to throw open all the blinds and curtains so that beautiful natural light can flood in.
Also, think about what your subjects are wearing. Light-colored clothing can add a nice brightness to your shots. If you’re feeling a little adventurous, you can toss in some reflective props, like a shiny vase or metallic objects, to catch the light and give your photos an extra pop.
Now, if you’re in a spot that feels a bit too dark, don’t worry! Using the camera’s built-in flash can help brighten things up, especially when your subjects are about 4 feet away. And here’s a little secret: using a tripod can make all the difference in keeping your photos sharp. It helps reduce any shake when you’re snapping your shots. With these tips, you’re all set for some fantastic indoor Polaroid photography. Now, how about we talk about framing those shots? Always consider protecting your camera with a hard case to ensure it stays safe during your indoor sessions.
Pay Attention to the Weather and Time of Day
Hey there! So, when it comes to planning indoor photography sessions, it’s super important to pay attention to the weather and time of day. You might be tempted to schedule a shoot whenever it suits you, but trust me, those factors can really make a difference in how your photos turn out.
Aim for late morning to early afternoon, roughly between 10 AM and 3 PM. That’s when natural light shines its brightest and gives your photos a vibrant pop! For instance, if you’re shooting an indoor portrait, good lighting can really highlight your subject’s features. But if you shoot during the early morning or late in the afternoon, your pictures can turn out a bit dull and dark.
Also, keep an eye on the weather forecast. If it’s calling for cloudy skies or rain, that could dampen your shoot’s vibe, so it might be better to reschedule. The right combination of time and weather will help ensure your camera captures images that are truly full of life. And once you have those elements sorted, the creative possibilities are endless! Remember to choose film with an ISO rating that suits indoor lighting to capture vibrant colors and sharp details.
Open Up All the Window Blinds and Curtains
Hey there! If you want to capture stunning indoor photographs, one of the simplest tricks is to open all the window blinds and curtains. Seriously, letting that natural light pour in can transform your shooting space. It brightens everything up, which means fewer harsh shadows on your subjects—perfect for keeping their features looking great in your shots.
For example, when you have indirect sunlight coming through, you can position your clients in a way that bathes them in this soft light, creating a beautiful glow in your images. It really helps when you don’t want to spend hours editing later! And if you’re thinking about backgrounds, bright settings combined with those open blinds can really amplify the overall look of your instant camera photos. Using acid-free and archival safe storage options also helps preserve the colors and quality of your instant photos for years to come.
Utilize Light, Bright Backdrops and Props
So, let’s talk about how light, bright backdrops and props can really amp up your indoor photography game. When you use light-colored backdrops like white or cream, they reflect natural light beautifully, making your photos feel vibrant and fresh. Imagine setting up a scene with a soft white backdrop and adding some pastel props—maybe a light pink vase or a pale blue cushion. This combination not only keeps the focus on your subject but also creates an inviting atmosphere.
On the flip side, using dark colors can really dim your images since they absorb light. So, when you’re coordinating your props and outfits, think about sticking to simple, complementary colors. For instance, if your backdrop is a soft cream, you might choose light gray or beige props that maintain a clean and polished look. This way, everything feels cohesive, and your subjects shine through.
To capture these scenes with the best clarity and stability, using an adjustable height tripod can provide the flexibility you need for ideal shooting angles.
Play With Camera Settings
Hey there! If you want to capture some gorgeous indoor shots, tweaking your camera settings is super important. Trust me, spending a little time experimenting with different exposure settings can really pay off in your specific space. For instance, if you’re shooting in a dimly lit room, cranking up the ISO can make a world of difference, helping you snap clearer photos.
Now, let’s talk about shutter speed and aperture. Slowing down your shutter speed to around 1/100th of a second can help reduce that annoying motion blur, while opening up the aperture to f/4 or wider creates this beautiful background blur, making your subject pop. Just remember that indoor lighting conditions are quite different from outdoor ones, so it’s all about practice and adjustment.
With just a bit of exploration and some hands-on work with these settings, you’ll be well on your way to creating those classic Polaroid-style images that really stand out! Excited to see how your photos turn out? Let’s check out some different lighting techniques next!
Also, consider using instant cameras with automatic exposure to simplify the process and enhance photo clarity indoors.
Practice, Experiment, and Share Your Work
Hey there! Have you ever thought about how important practice and experimentation are when it comes to using instant cameras? Regularly snapping photos helps you get a feel for how they work, and that can really sharpen your photography skills. For instance, try playing around with different lighting, like shooting during golden hour to capture those warm, soft tones. It’s all about finding what styles resonate with you and spark your creativity.
Once you have some pictures you’re proud of, sharing them on social media or in photography groups can be a great way to connect with others. You might get feedback that helps you see your work in a new light. Plus, don’t stress over any missteps; sometimes those “mistakes” turn into the most interesting shots! Attending local photography meetups can also offer you inspiring learning experiences while mingling with fellow photo lovers. Adding LED photo clip string lights as a creative display can brighten up your memories and enhance your indoor photography presentations.
Frequently Asked Questions
How to Take Good Polaroid Pictures Indoors?
To take good Polaroid pictures indoors, we should focus on lighting techniques, position our subjects near windows, choose light-colored backgrounds, and select bright props. These elements help us create vibrant, enchanting instant photos that shine!
What Is the 20 60 20 Rule in Photography?
Imagine painting with light—our 20-60-20 rule emphasizes subject focus, with 60% devoted to the main element, balanced by lighting techniques and color balance to enhance composition strategies for breathtaking captures every time.
What Are the Best Camera Settings for Indoor Photography?
For indoor photography, we should adjust our lens aperture for lighting conditions, guarantee camera stability to reduce shake, and utilize effective composition techniques to capture the best images in various environments.
What Is the 3:1 Rule in Photography?
When it comes to great photography, we’ve gotta follow the 3:1 rule. It helps us master composition techniques by balancing lighting tips, framing subjects effectively, and ensuring color balance for fascinating images that truly shine.