As an Amazon Associate, we earn from qualifying purchases. Some links on this site are affiliate links at no extra cost to you. Our recommendations are based on thorough research and editorial judgment.

How to Load Film Into Your Instant Camera Correctly
To load film into our instant camera correctly, we start by making sure it’s off. Next, we open the film door gently and align the film cassette with the yellow stripes matching the camera’s design. We ensure the darkslide faces up and place it carefully into the chamber, then secure the door with a firm click. After that, we power on the camera, ready to snap our first photo. Curious about troubleshooting tips? Keep going!
Key Takeaways
- Ensure the camera is turned off before opening the film door to prevent damage to the film.
- Align the darkslide facing upwards with the plastic base at the bottom before inserting the film cassette.
- Check color compatibility of the film cassette with your camera model for proper alignment during loading.
- Slide the cassette into the camera gently, making sure it fits securely and aligns with the door frame.
- Close the film door firmly until a click is heard to prevent light leaks that could ruin photos.
Preparing Your Instant Camera

You may be interested


Alright, let’s get your instant camera ready to snap some awesome memories! The very first thing we need to do is pop in two AA batteries into the battery compartment of our Fujifilm camera. Make sure to check that they’re facing the right way—nothing worse than getting ready to shoot only to find out the batteries aren’t seated properly!
Now, before we open up the film door, let’s double-check the battery life. Your camera needs that juice to work its magic! Once that’s sorted, turn your attention to the film packets. Check those expiration dates; using expired film can lead to some disappointing results, like faded colors or blurry images. If you’ve got any extra film lying around, store it in a cool and dry spot to keep it fresh—just like how you’d keep your favorite snacks!
Make sure to use film that matches your camera’s film type compatibility to ensure the best results.
Finally, taking a little time to get familiar with your camera’s features will make loading film and snapping pictures a lot easier. It’ll be like second nature to you before you know it! And with everything set up, you’ll be ready for a fun photography adventure ahead.
Choosing the Right Film

Hey! So, when you’re trying to capture those unforgettable moments, picking the right film is just as crucial as choosing the perfect camera. Trust me, it’s not just about snapping the photo; you’ve got to think about film compatibility too. For instance, if you’re using a Fujifilm Instax camera, you’ll need to grab some Instax Mini film. On the flip side, if you’ve got a Polaroid Go camera, you’ll want to use the specific Polaroid film cassettes designed just for that.
Now, here’s a thing a lot of people overlook: checking the expiration date on your film. Using expired film can really affect your results, leaving you with dull or warped photos that don’t capture the moment as you’d hoped. Also, keep an eye on prices because they can vary quite a bit. And don’t forget to store any unused film in a cool, dry spot to keep it fresh and ready whenever inspiration strikes. By keeping these tips in mind, you’ll set yourself up for perfect instant photo experiences every time you click that shutter.
Remember, different instant films also come with unique design features, like the Fujifilm Instax Mini Character Films which have charming borders and add a creative flair to your photos.
Speaking of inspiration, let’s talk about some creative ways you can use those instant prints once you’ve captured them!
Recommended Products

For Instax mini instant cameras

Designed for use with Fujifilm instax mini series cameras

INSTAX COMPATIBILITY: Use our film with your Fujifilm Instax Mini cameras including the Mini 12, Mini 11, Mini 9, Mini 8, Mini 7+, Mini 40, Mini SP-2, Mini Link, Mini 90, Mini 70, Mini 40, Mini Hello Kitty, Polaroid PIC 300 and other Instant Film Cameras!
Opening the Film Door

Opening the film door on your instant camera is super important for capturing those unforgettable moments, and it’s actually pretty easy! First things first, make sure the camera is switched off. This prevents any accidental exposure or damage to the film—trust me, it’s not fun to ruin a roll you were excited to use.
Now, to open the film door, just find that little spring or button mechanism at the top and gently press it. While you’re at it, give the door a quick check for any dirt or bits that might get in the way. For example, if you notice any lint or dust, take a soft cloth and wipe it down. Handling your camera with care really helps keep everything running smoothly.
Once you’ve finished loading your film, you’ll hear that comforting little click when the door closes properly. This lets you know that your film is safe and ready to go! It’s always important to use compatible film types to avoid damage to your camera or poor image quality. And with that, you’re all set to start capturing beautiful memories. Let’s move on to how to actually take those awesome shots!
Recommended Products

Professional Customization: Applicable to Fujifilm Square SQ40 SQ1/SQ10/SQ20/SQ6/SP-3 instant film camera users, whether you are shopping, traveling, or even having an outdoor picnic, can protect your photos
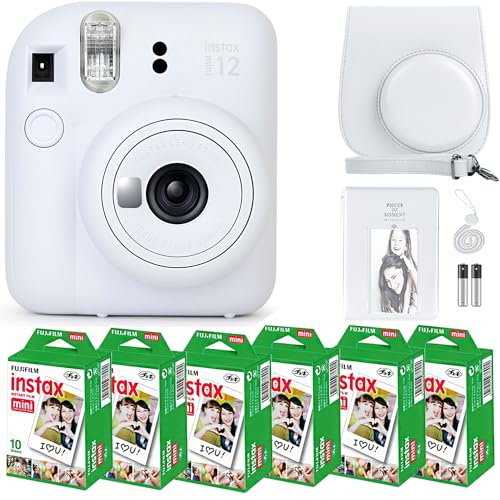
FEATURES FUJIFILM INSTAX MINI 12 INSTANT CAMERA : Fujifilm Instax Mini 12 camera with Fujinon 60mm lens and optical viewfinder—this instant print camera lets you capture and print photos instantly, creating bright 2”x3” credit-card–size memories in seconds.

Mini 12 case cover accessories are specially designed for Fujifilm instax mini 12 instant camera, allowing you to enjoy all your photography fun and enjoy quality time with family or friends (Note: Not included instax mini 12 instant camera)
Positioning the Film Cassette
Alright, now that we’ve got the film door securely closed, let’s chat about how to position the film cassette just right. First things first, make sure the darkslide is facing up, with the plastic base resting at the bottom of the camera. If you’re using a Polaroid Go, check that the cassette color matches the color on your camera—this little detail helps with proper alignment.
When it comes to handling the cassette, hold it firmly by its sides. This is super important to avoid damaging those sensitive chemistry pods inside. To insert the cassette, slide the thick end in first; it should drop into place easily. If that darkslide doesn’t pop out like it’s supposed to, don’t panic. Just double-check that the cassette is pushed all the way back, and then try inserting it again. Also, remember that proper film storage in a cool, dry place can help maintain the film’s quality and performance.
Recommended Products

MINI FILM ONLY COMPATIBLE WITH POLAROID GO: The Polaroid Go only uses Polaroid Go format films. The same Polaroid you know and love, only smaller. Go Film is not compatible with full size Polaroid I-Type Now Cameras
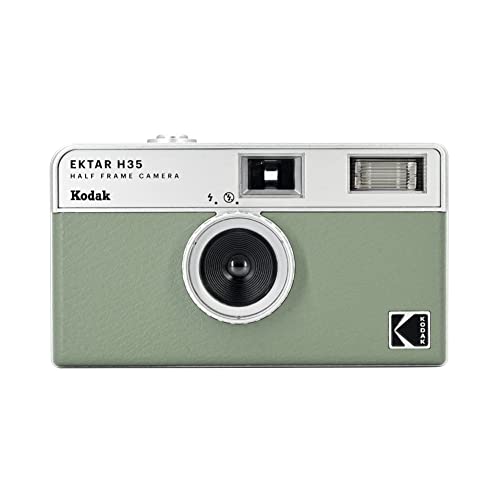
📷 Film-saving: You can have twice as many images per roll. For example, a film roll with 36 exposures can yield around 72 half-frame photos - doubled!

Updated Classic- The classic Polaroid film is back with a new formula exclusively for I-Type cameras with 40 classic iconic white framed photos.
Securing the Film in Place
Hey there! So, if you want to make sure your film is secured perfectly in your camera, it’s super important to align the yellow stripe on the film cartridge with the matching stripe in the camera’s film door. This little detail is crucial for getting the best shots and keeping your images safe.
When you’re handling the cartridge, make sure you insert it with the darkslide facing up and the plastic base resting at the bottom. You know that satisfying click when it’s in place? That’s your confirmation that it’s all locked in. After that, do a quick double-check to ensure the cassette is pushed all the way back. If you find that the darkslide doesn’t come out, don’t worry—just pull the cassette out and re-insert it. And remember, hold off on yanking that pull-tab sticker until you’re ready to start shooting.
Taking a moment to secure the film properly not only safeguards your future photos but also makes your shooting experience much smoother and more enjoyable. Once you’ve done that, let’s talk about how to actually get those shots looking amazing!
For optimal results, make sure to use films compatible with your camera model to ensure proper fit and function.
Recommended Products

[TRUE COLOR & REAL PHOTO] - Kodak's 4PASS Technology prints 4x4" photo in layers of ribbon and laminates the photo so you can touch the photo right away. It is fingerprint and water resistant.

Designed for use with Fujifilm Mini Series cameras

CRISP, CREDIT CARD-SIZE INSTANT PRINTS: Capture Everyday Moments With Fujifilm Instax Mini Film, The Trusted Instant Film For Bright, Sharp, Credit Card-Size Photos With Clean Detail And Classic White Borders. This Instax Mini Film Is Ideal For Fujifilm Camera Users Who Want Reliable Camera Film For Parties, Travel, Scrapbooks, And Memories From Their Favorite Instant Film Cameras And Mini Instant Camera Setups.
Closing the Film Door
Alright, let’s talk about closing the film door on your camera. It might sound simple, but getting it just right is crucial for the whole process. First things first, make sure those yellow stripes on the film cassette line up perfectly with the door frame. If they’re not aligned, you could run into some trouble later on.
Now, when you’re ready to close it, just press the door firmly until you hear that satisfying click! It tells you that the door is securely locked—no force needed here. We definitely want to avoid any chance of light leaks, which can mess up all those great shots you want to capture. And here’s a quick tip: if you peek through the circular window and see an ‘S’, that’s your green light to start shooting!
Remember, different cameras might use varying printing technologies, so always check your model’s specifications before loading the film.
Understanding the Darkslide Function
Understanding the darkslide function is super important if you want to get the best results from your instant camera. Think of the darkslide as a protective shield that keeps your film safe from light until you’re ready to snap that perfect shot. When you load your film and close the door, the darkslide should pop out automatically, letting you know everything’s set up right.
If it doesn’t eject, that could be a sign your film isn’t aligned properly, so it’s a good idea to double-check how you loaded it. For example, make sure the film pack is snug and that you’ve followed the loading guides closely. Remember, don’t try to remove the darkslide manually while loading; doing that could mess with the film and lead to ruined photos.
Keeping your darkslide in check means your film is ready to go whenever you are. Following these simple steps will help ensure you capture every moment without any hitches. Also, storing your film properly before use is crucial to maintain its quality and performance. Now let’s keep that momentum going and explore how to best care for your instant camera!
Powering On the Camera
Alright, let’s get that Fujifilm Instax Mini 8 camera powered on so we can start snapping some great photos! The first thing you need to do is make sure you’ve got two AA batteries correctly installed in the battery compartment. It’s pretty simple—just slide open that compartment, pop the batteries in, and make sure they’re facing the right way, just like you would in a remote control.
Once your batteries are in, check the battery life indicator. If it shows there’s enough charge, you’re all set! If not, you’d need fresh batteries or you won’t be able to use the camera. To actually turn it on, just press the button near the lens. It’ll extend out, giving you that satisfying click, and that means your camera is ready to rock. If nothing happens when you press the button, double-check the battery placement—sometimes they can be a bit finicky.
For optimal performance, always ensure that the battery you use meets the camera’s voltage requirements to avoid any issues.
With the power on and the readiness light lit up, you’re ready to load your film and start capturing those memories. Let’s move on to loading the film next, shall we?
Taking Your First Photo
Alright, let’s get ready to take our first photo! Now that we’ve loaded the film and powered on the camera, it’s time to have some fun with those first photo techniques. Grab your camera, and let’s talk about how to capture a great shot.
First, we want to use the viewfinder, which is basically your eye’s guide to framing your subject. If you’re trying to snap something a bit closer, don’t hesitate to shift your position a little to get that sweet angle. For example, if you’re photographing a friend, try kneeling or tilting the camera slightly to add some interest to the shot.
Once you feel good about the composition, go ahead and press that circular button. Just make sure your fingers stay clear of any obstructions! When you do this, you’ll see the camera eject a black plastic cover; this little layer helps protect your photo while it’s developing. And remember, keep shooting until the counter hits zero! That’s your sign to reload with new film. Let’s keep the creativity flowing as we explore composition techniques next!
For safety during your photography activities, it’s best to choose equipment with ergonomic handle grips to reduce hand fatigue and improve comfort.
Troubleshooting Common Issues
Hey! I totally get that the excitement of snapping those first images can sometimes come with a few bumps in the road. For instance, if you notice that the darkslide isn’t ejecting after you close the film door, don’t worry—it’s a pretty common issue. Just take a moment to re-insert the film pack and make sure it’s pushed all the way back in. Oh, and double-check the pull-tab sticker on the film cartridge; if it’s missing, it could be causing trouble.
Now, let’s talk about batteries. It’s super important to ensure they’re correctly inserted and have enough juice. A quick tip: if your camera is sluggish, sometimes just swapping in a fresh set can do wonders. And then there’s film alignment—always line up that film cassette with the color indicators on your camera. If you’re still hitting roadblocks, watching video instructions might give you a clearer picture of what’s going on.
Also, consider storing your camera and film in a protective instant camera carrying case to prevent damage and keep everything organized on the go.
Frequently Asked Questions
How Do You Put Film in an Instant Camera?
To put film in our instant camera, we should follow film loading tips, ensuring the correct alignment with our camera type. Let’s prioritize film safety precautions, double-checking everything’s secure before starting our photography adventure!
Which Way Does Film Go in Instax?
When loading film into our Instax, we need to guarantee the glossy side faces outward and align the yellow stripes. Avoid common loading mistakes to get vibrant pictures—let’s remember these film orientation tips together!
Should Polaroids Be Face up or Down?
When it comes to Polaroid orientation, we should always keep those lovely pictures face up while loading. With some film loading tips and instant camera care, we’ll capture memories perfectly every time together!
How to Properly Load a Film Camera?
To properly load a film camera, let’s guarantee we’re using the right film type, follow recommended loading techniques, and remember to perform regular camera maintenance. This way, our photography will always shine!