As an Amazon Associate, we earn from qualifying purchases. Some links on this site are affiliate links at no extra cost to you. Our recommendations are based on thorough research and editorial judgment.
Creative Light Trail Photography With Instant Cameras
Creative light trail photography with instant cameras is a fun way to explore unique visual stories. Using tools like handheld LED lights, we can create enchanting effects, though instant cameras have fixed exposure times of just 0.25 seconds. This limitation makes it tricky to capture long trails. However, by experimenting with movement and different backgrounds, we can achieve vibrant results. Make sure to try various lighting techniques and settings to elevate your shots; there’s much more to discover!
Key Takeaways
- Use a custom light tool made from a flashlight and tube for better control over light trails in instant photography.
- Choose darker environments to enhance visibility and color vibrancy of light trails captured with instant cameras.
- Take multiple quick shots with fixed exposure settings to refine your techniques and capture the best moments.
- Experiment with various colored LEDs or glow sticks to create dynamic and vibrant light effects in images.
- Employ short exposure times to freeze action and plan movements ahead for effective interaction with light sources.
My Typical Light Painting Process

You may be interested


You know, when we really get into our light painting process, it’s like magic happens. Picture this: we take a handheld light tool and use it to paint behind a dancer, creating these stunning trails of light that look incredible on camera. It’s all about timing; we move the light just right to not only highlight the model but also to leave captivating traces in the air.
We’ve crafted a unique tool for this. Imagine a flashlight at the end of a tube decorated with fun holographic stickers—that’s our light source! This setup allows for omnidirectional light, which means it can glow in all directions, making the effects super dynamic. After a lot of practice—over 200 photoshoots!—we’ve nailed down the perfect camera settings: f/2 aperture, ISO 1600, and a shutter speed of 0.25 seconds.
Using LED string lights in combination with instant cameras can enhance the atmosphere and add creative flair to light painting photography.
The Challenge With Lighting Painting and Instant Cameras

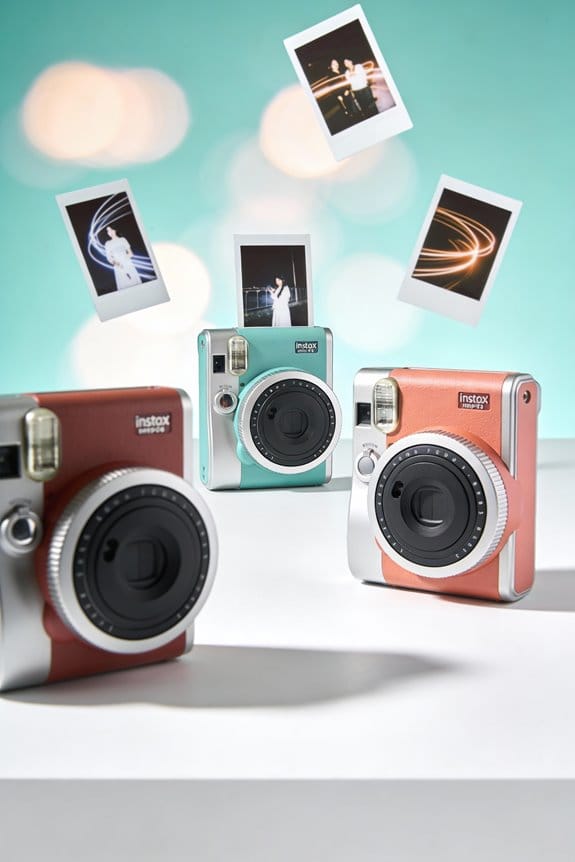
Light painting with instant cameras, like the Fujifilm Instax Mini Evo™, can be a bit of a rollercoaster, even if you’ve got some photography experience under your belt. The camera has a fixed exposure time of only 0.25 seconds, which really limits how you can move around to create those cool light trails. Imagine trying to draw with a flashlight in a blink-and-it’s-gone moment; it definitely takes some practice!
Plus, we have to consider the camera’s automatic settings, which can throw a wrench in your plans at times. It’s not uncommon to miss that perfect shot because the camera decides to do its own thing right when you’re ready to click. And don’t forget about the delay – there’s usually a tiny pause after you press the shutter button, so timing really is everything.
After around 200 practice shoots, we’ve played around with custom light sources to help control the chaos a bit better. For example, using a handheld LED light gives you the ability to create more defined trails without the uncertainty of the camera’s auto settings. With some dedication and experimentation, you can definitely figure out how to maneuver through these challenges and capture some truly stunning light-painted images. So, if you’re ready to give it a shot, there’s a world of creativity waiting for you! To achieve optimal results, be sure to work with soft, natural light whenever possible to enhance the vibrancy of your instant photos.
A Light Painting Solution

Capturing dynamic light trails with instant cameras like the Fujifilm Instax Mini Evo™ can definitely be tricky, but I’ve got some great tips to make it easier! One fun approach is to create your own light tool using a small tube and a flashlight. This little gadget lets you direct light in all sorts of directions, which really elevates your light painting sessions and makes your images pop.
When it comes to settings, aim for a fixed exposure time of 0.25 seconds. That means you’ll need to slow things down a bit, so I usually stick to an aperture of f/2 and ISO 1600. After taking over 200 photos, I noticed that spinning the light tool while shooting creates the most captivating trails. If you’re feeling adventurous, try experimenting with different colors or speeds of your light to see how it changes the vibe of your photos. Using creative project ideas can further inspire unique ways to enhance your instant photography experience.
About the Light-Painting Tool
Hey there! Let me tell you about this awesome light-painting tool we’ve been using. What started as a simple sugar tube has turned into a super cool gadget that really amps up our photography sessions. We’re using a handheld flashlight as our main light source, which makes it so easy to play around with natural light and create some amazing effects.
One of my favorite tricks is adding holographic stickers to our setup. They make the light spread out in all directions, so when we’re moving the flashlight, it creates long, mesmerizing light trails. For example, when we use the rear curtain sync technique – where the flash fires just before the shutter closes – the results are simply stunning. We’ve practiced this technique over 200 times, and trust me, it shows!
This tool really lets us capture dynamic light patterns in a way that brings our light painting to life. If you’re into creative photography and want to try something different, I can’t recommend this setup enough. It’s a fun way to experiment with light and get some amazing shots! Speaking of creativity, have you ever thought about how different lighting can change the mood in your photos? Using color filters can further enhance the artistic expression by altering the color temperature and mood in your images.
About the Camera
When we get into light trail photography, the Fujifilm Instax Mini Evo™ camera really shines as our go-to tool. It has a great 28mm lens that lets us get those close-up shots while keeping the dancer just outside the frame, which is perfect for light painting. We love using the Bulb mode, where we can stretch out the exposure times and create some stunning effects.
Now, here’s a little tip: even though the camera has a fixed 0.25 seconds shutter release, timing becomes super important. Getting that timing right helps us capture those dynamic trails effectively. Plus, the camera has automatic settings that add a sprinkle of surprise to our shots, making every photo a fun adventure. And the best part? The built-in printer gives us instant results, so we can see our artistic efforts come to life right away!
To keep your mini Evo ready for creative shoots, consider investing in a durable protective case to ensure your camera stays safe and portable during outdoor sessions.
If you’re thinking about trying something new in light trail photography, the Mini Evo™ is definitely worth considering. It brings a fresh perspective to capturing those magical light trails.
Tips for Successful Light Trail Photography
If you’re eager to jump into light trail photography, there are a few solid techniques to keep in mind that will really elevate your shots. First off, using a tripod is a must—it keeps your camera steady while you capture those mesmerizing trails of light. And hey, if you can, get yourself a remote shutter; it helps you avoid any camera shake when you press the button.
Now, let’s talk about the backdrop. A dark setting works wonders because it makes the light trails pop! For example, if you’re out at night, look for a spot with minimal streetlights or other distractions. When it comes to shutter speed, aiming for somewhere around 10 to 20 seconds usually does the trick to perfectly capture the movement. You can experiment with different light sources too—think colored LEDs or even simple flashlights to create interesting patterns.
Another tip? Use manual focus to get those pictures as sharp as possible, so adjust it before hitting that shutter. Oh, and keep your ISO set low at 100 and try an aperture of around f/8. This will cut down on noise and keep your images looking crisp and detailed. With these techniques, you’ll be well on your way to capturing stunning light trails that will amaze your friends! To protect these vibrant photos, consider storing them in acid-free and PVC-free protectors that prevent yellowing and fading over time.
Creative Techniques to Enhance Your Light Painting
Hey there! If you want to take your light painting photography to the next level, there are some really fun creative techniques to explore. One cool way to make your images pop is by playing around with different shutter speeds. For example, a longer exposure can really capture those sweeping movements, while a short one can freeze an action.
Another tip is to experiment with various light sources. Instead of just using plain white light, try colored LEDs or even glow sticks to add some vibrant hues to your shots. You might also find it helpful to plan your moves during those brief 0.25-second exposures. Think about how you can interact with the light, like waving a flashlight around or creating shapes with it.
Lastly, don’t be shy about taking multiple quick shots. This lets you refine your techniques until you capture just the right moment. Each photo can represent a step in your creative journey, helping you find that perfect light painting that really speaks to you. Now, let’s talk about how you can incorporate some cool background ideas to enhance your next session!
Using an instant camera with advanced thermal printing technology can also add a fun and immediate element to your creative light trail photos by providing quick and vibrant prints on the spot.
Final Thoughts on Experimenting With Instant Cameras
Have you ever tried experimenting with instant cameras? It’s such a fun way to explore light trail photography! I’ve found that timing plays a huge role in capturing those magical moments. For instance, with just five seconds of exposure, you can create some truly captivating images that showcase your artistic flair.
Using cameras like the Fujifilm Instax Mini Evo™ really helps you think outside the box. Since you can’t adjust the exposure settings like on a DSLR, you have to get creative with your lighting. I love using handheld light sources, like colored LED lights or even flashlights, to draw shapes in the air. The darker the environment, the better your results will be, so find a spot away from streetlights to really bring those colors to life. Additionally, understanding the development time of your instant film can help you better plan your photography sessions and manage expectations while your photos appear.
Frequently Asked Questions
How to Make Light Trails With a Camera?
To create stunning light trails with our camera, we’ll use long exposure techniques, adjusting our shutter speed appropriately. Let’s experiment with different light sources and creative techniques for fascinating results that truly shine!
What Is the 20 60 20 Rule in Photography?
It’s ironic, but the 20 60 20 rule isn’t just about rigid numbers. It’s a guide blending light exposure, composition techniques, and subject matter to maintain color balance. Let’s embrace flexibility for enchanting images together!
What Camera Settings Are Needed for Light Trail Photography?
For light trail photography, we should use long exposure, adjusting our shutter speed between 10-20 seconds. Keeping ISO settings low and applying effective focus techniques guarantees sharper, more vibrant images. Let’s experiment together!
What Is the 500 Rule for Night Photography?
In our quest for starlit magic, the 500 Rule helps us navigate night photography basics. By balancing light exposure techniques and shutter speed tips, we’ll avoid the unwanted star trails effect and capture breathtaking imagery.