As an Amazon Associate, we earn from qualifying purchases. Some links on this site are affiliate links at no extra cost to you. Our recommendations are based on thorough research and editorial judgment.

Creating Double Exposures With Instant Cameras
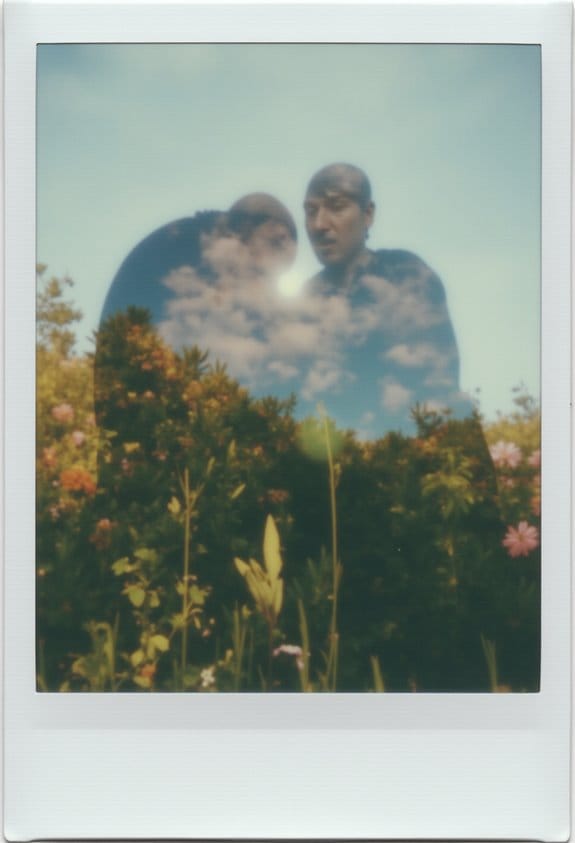
Creating double exposures with instant cameras is an exciting way to combine multiple images, telling unique stories through visuals. We can activate double exposure mode easily, simply by pressing the self-timer button twice. For great results, start with a dark silhouette as your first photo, then layer a vibrant second image. To enhance our shots, we should focus on textures and patterns while keeping an eye on lighting. If we keep exploring, we’ll discover more tips and techniques to perfect our craft.
Key Takeaways
- Activate double exposure mode by pressing the self-timer button twice to layer images creatively.
- Start with a dark or backlit subject for the first photo to enhance contrast.
- Focus on capturing textures or vibrant colors for the second exposure to blend effectively.
- Use a tripod for stability and plan compositions to maintain balance in the final image.
- Experiment with backgrounds and lighting to add depth and character to your double exposures.
Understanding Double Exposures: A Creative Overview
You may be interested


Hey! Have you ever tried creating double exposures? It’s such a fascinating technique that combines multiple images into one frame, telling captivating stories through visuals. Think of it as blending a beautiful landscape with a dreamy portrait; the possibilities are endless!
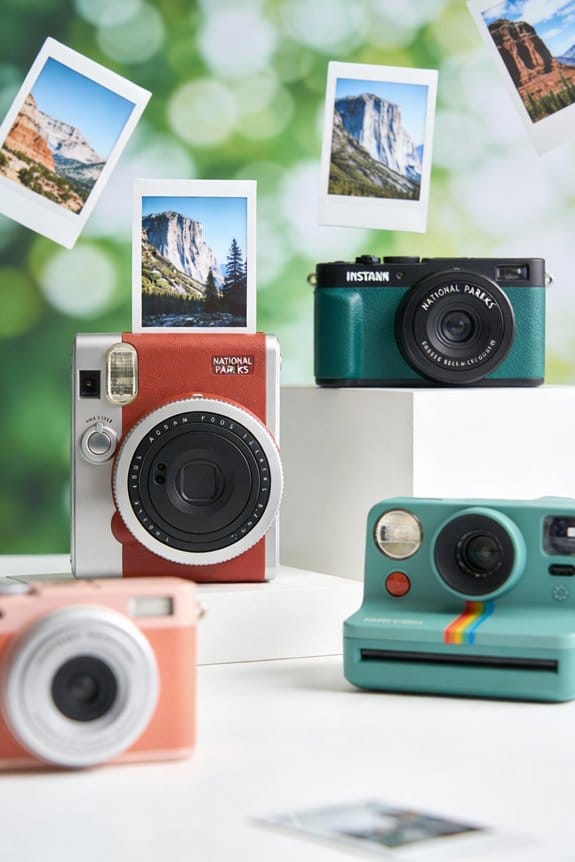
If you’re curious about trying it out, instant cameras from Lomography can be a fantastic way to start. They come with some cool features that let you layer images, giving you the chance to play around with your shots. For example, you could take a shot of a beautiful sunset and then layer it with a photo of a friend laughing in the park. Just make sure to pay attention to the light and textures in both images; it can really make a difference in how they come together.
One handy tool is the Splitzer attachment, which allows you to expose only certain parts of the frame. Imagine taking half a shot of a city skyline and the other half of a forest; it creates this stunning contrast! So, if you’re feeling adventurous, gather some interesting photos and let your creativity flow. You’ll be surprised by how these blends come together seamlessly! Many hybrid instant cameras also offer built-in lens effects that can enhance your creative exposure experiments.
Activating Double Exposure Mode in Instant Cameras
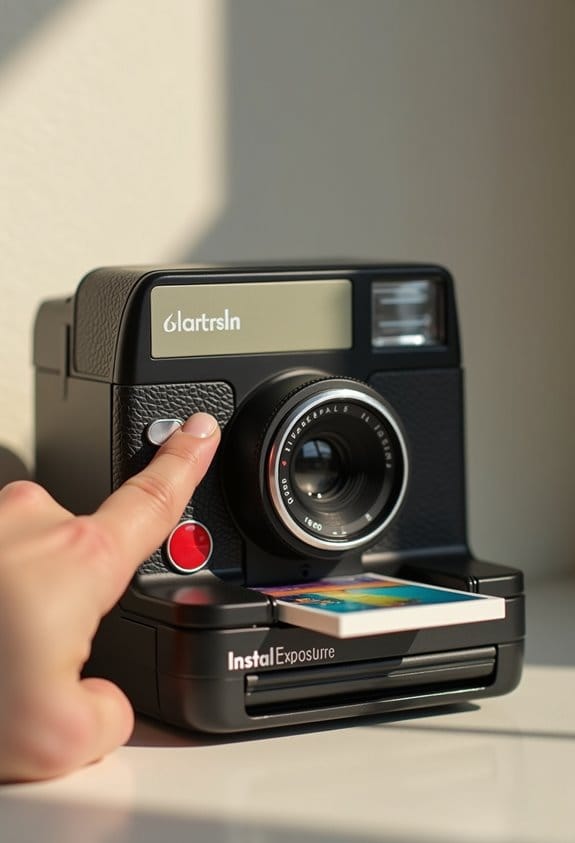
Creating intriguing double exposures with instant cameras is surprisingly simple! If you have a Lomography instant camera, activating double exposure mode is just a matter of pressing the self-timer button twice. Once you do that, you’ll see a little flash on the display—’1′ for your first photo and ‘2’ for the second. It’s a fun way to layer images and get super creative!
You can spice things up even more by using the self-timer feature along with the double exposure mode. For instance, try taking your first picture with a dark backlit subject, like a person against a sunset. Then, for your second shot, focus on capturing textures, like tree bark or a colorful wall. This contrast will really make your images pop!
Also, if you have the Diana Instant Square, it’s neat because it has an MX mode switch. This allows you to take multiple exposures without even having to eject the film, giving you more freedom to experiment. Just keep an eye on your lighting—some models come with an exposure compensation feature that has a +/- 1 button, which can help avoid overexposing your shots. So gear up and enjoy the creative process; it’s about capturing moments in a unique way! Many compact instant cameras now include creative modes like double exposure to enhance artistic expression.
Recommended Products

Wearable and take anywhere-able: As the Polaroid’s smallest instant camera, the Polaroid Go fits in almost every bag, tote, pocket and pack. So you can capture real life wherever, whenever.

Wearable and take anywhere-able: As the Polaroid’s smallest instant camera, the Polaroid Go fits in almost every bag, tote, pocket and pack. So you can capture real life wherever, whenever.

NOW+ GENERATION 3 - The Polaroid Now+ Generation 3 Instant Camera is the classic analog instant camera that easily connects to the Polaroid app via Bluetooth to unlock so much more.
Tips for Capturing Your First and Second Photos
Hey there! Let’s talk about how you can take your double exposure photography to the next level using instant cameras. For your first photo, aim for something dark or backlit; this will really make the contrast pop! Instead of using the flash, try underexposing the shot just a bit. This technique will help highlight your subject more clearly when you layer the images together. Think about capturing a silhouette of a tree against a sunset for that dramatic effect.
Now, when you’re ready for the second image, pick a texture or a pattern. This could be something like the surface of a brick wall or the leaves of a tropical plant. It’ll add depth and make the final photo much more visually appealing. One tip: keep an eye on where the light and dark spots are in your first shot. If you’re working with moving subjects, a tripod can be a lifesaver. It keeps everything steady and helps line up your shots perfectly.
Also, remember that most instant cameras use film with an ISO rating of 800, which contributes to vibrant colors and sharp image quality in your double exposures.
With these simple strategies, you’ll be on your way to capturing some amazing instant photos that really showcase your artistic vision! Ready to explore more techniques?
Recommended Products

For Instax mini instant cameras

Sharp autofocus: The Polaroid Now’s twin-lens autofocusing system chooses which lens is right for the shot, without you having to do anything.
📷 Film-saving: You can have twice as many images per roll. For example, a film roll with 36 exposures can yield around 72 half-frame photos - doubled!
Best Practices for Portrait Photography
Capturing stunning portraits is such an exciting yet sometimes tricky endeavor, right? If we want to really make our subject pop, it’s best to choose a seamless, non-white background that won’t draw attention away from them. For instance, a vibrant blue or soft gray can really enhance the look without being distracting.
When shooting, try slightly underexposing your subject in that first photo. It sounds counterintuitive, but this little technique can actually help bring out more detail later on when we combine the images. Plus, using a tripod can seriously help keep our frame steady, especially if our subject is moving around a bit. Imagine trying to capture a kid running—trust me, the tripod will be your best friend there!
Backlighting is another fun element to play with. It can create a lovely glow and add depth to your portraits. And don’t forget about the backgrounds; interesting outdoor settings or textured walls can add so much character. You might find a weathered wooden fence or a field of wildflowers lends a beautiful touch. By weaving in these elements, you’ll produce portraits that not only stand out but also tell a story.
For those using instant cameras, consider the instant photo development time as it allows immediate review and creative experimentation.
Recommended Products

[ Multiple Color and Brightness Levels ]: 360° Full Color will be make your photography more colorful. LED light panel adopts 70pcs led beads, illuminance up to 1100Lux(0.5M). Use index lamp beads, CRI≥97,TLCI≥97, RA≥97 to provide a more realistic light source for your shooting and it can brighten up your videos or pictures. 10 Levels of Brightness: easily switch color temperature between 5400K and 5800K dimmable to meet all your needs in different circumstances.

Sturdy & Stable Construction: Crafted from premium aluminum alloy with a durable metal coating, this light stand ensures enhanced stability and corrosion resistance for long-lasting use. Supports up to 11 lb(5 kg), ideal for photography studios, video shoots, content creation, podcasts, YouTube, and TikTok

The light stand is made of aluminum alloy, making it strong for heavy duty work.
Creative Techniques for Unique Double Exposures
Have you ever tried double exposures in your photography? They’re such a fun way to combine different images into a single striking frame! For starters, you might want to take a strong silhouette shot as your base and then layer it with vibrant textures or backgrounds. Imagine capturing a shadowy figure against a colorful sunset – the contrast is just breathtaking.
If you happen to have a Lomography camera, using a Splitzer attachment can be a game-changer. This nifty tool lets you selectively expose different parts of your frame, so you could capture a city skyline on one half and a serene forest scene on the other. Mixing elements like that not only adds depth but also tells a unique story.
You can also get creative with patterns. Try merging a close-up of flowers with a bustling street scene – it can create a delightful surprise! These techniques are all about sparking your creativity and capturing something truly special. So, let’s start exploring these ideas and see what amazing double exposures we can come up with!
To enhance your double exposure shots, consider using color filter sets to add unique hues and effects that elevate your images to the next level.
Displaying and Sharing Your Double Exposure Art
You know, displaying and sharing your double exposure art can be just as thrilling as creating it! One great way to showcase your best shots is by using floating glass frames. They offer a sleek, modern look that really lets your creativity shine. You could even get crafty with DIY displays, which allow you to swap out images whenever you feel like it; this keeps your space fresh and fun!
Don’t forget about those images that didn’t turn out as perfect as you’d hoped. Sometimes, those can actually show how much you’ve grown as an artist. Sharing your work on social media is another fantastic way to connect with fellow photographers. You’re not just showing off your creations; you’re inviting feedback and getting inspired by others in the community.
And speaking of sharing, have you thought about making a physical album of your double exposures? There’s something special about flipping through tangible prints. It not only captures your artistic journey but also makes it easy to reminisce about your progress. These collections can serve as great conversation starters, too! So, whether you’re framing, sharing, or preserving, each step adds to your artistic story. What will you do next with your photo hangers?
Items and Preparation Needed for Successful Shots
Alright, so if you’re looking to get those stunning shots with instant cameras, you’ve gotta start with the right gear. I recommend grabbing the FUJIFILM instax SQUARE® SQ-6 and making sure you have plenty of FUJIFILM instax SQUARE® film on hand. Trust me, you’ll want it!
For those awesome double exposures, keep the camera flash off and try to stick to shady spots or twilight hours to avoid harsh light. It’s amazing how some patience and a bit of thought can lead to really creative compositions. For instance, instead of rushing, take a moment to visualize the final image you want to create—maybe combining a sunset with a silhouette of a tree. And don’t forget about that auto shutoff feature; it kicks in after five minutes, so keep an eye on it to make sure you don’t miss capturing that perfect moment.
Having a clear concept can make all the difference. The more you think ahead about what you want to capture, the smoother your shoot will go. Let’s gear up for some fun and get ready to make some unforgettable memories! What else do you want to know about shooting with instant cameras? Remember, choosing a camera with automatic exposure can help you get the right brightness for your shots, especially in varied lighting conditions.
Recommended Products

Now available in a 20 exposure pack

Value pack instant film with traditional white frame (20 Shots Total)

Square 1: 1 format
Techniques for Capturing Stunning Double Exposures
Capturing stunning double exposures might feel a bit daunting at first, but it’s actually all about a few simple techniques that can make your photography pop. Think of it this way: you start with one image that features a silhouette or a darker subject. This forms the foundation of your shot. Then, you layer in a second image that’s bursting with texture or vibrant colors. For example, let’s say you’ve got a profile of a person against a sunset, and then you want to add in a shot of colorful autumn leaves – the combination can create some magical effects!
One cool tool to use is a Splitzer attachment, which lets you expose different parts of your film separately. Thanks to this, you can mix and match elements creatively. It also pays to play around with lighting. Try backlighting your subject or experimenting with shadows; it can really enhance those contrasts you’re going for. Don’t forget about camera settings! For instance, if you’re shooting in tricky light conditions, bumping ISO 400 film up to ISO 800 might help you capture more detail without getting too grainy.
Lastly, before you snap that picture, take a moment to visualize your composition. A well-planned shot will help maintain balance and harmony in the final image. The next time you’re out shooting, remember these tips – you’ll be well on your way to creating some awesome double exposures!
Also, protecting your camera gear with a durable lens cap can help maintain the clarity and quality needed for capturing perfect shots every time.
Community Engagement Through Creative Photography Projects
You know, engaging with our community through creative photography projects can really open up some wonderful experiences. Imagine organizing a fun instant photography workshop where everyone can bring their unique styles and ideas to the table. It’s a fantastic way to bond with others while exploring art together.
We could even host cool challenges, like double exposure photography, where people can experiment with layering images. Picture this: one participant captures a local park, while another layers that with a memory from their childhood. Each project not only helps document our surroundings but could also shine a light on important causes, like encouraging more pet adoptions in our area.
When we set up spaces for creativity, everyone has a chance to experiment and share their work. It’s an awesome way to strengthen our community ties and learn from one another. By setting themed challenges or getting involved in local events, we’re not just improving our photography skills but also making meaningful connections. Let’s seize this chance to engage with our community through photography—imagine all the stories we’ll capture together!
Using cameras with double exposure capabilities can add an exciting creative dimension to these projects and inspire even more artistic expression.
Exploring the Blend of Instant and Digital Photography
You know, as we chat about instant and digital photography, it’s fascinating how blending these two styles can really amp up our creative projects. Instant cameras let you snap double exposures right there on the spot, and many of them even have neat features built in that skip the whole digital editing process. This immediate satisfaction is such a cool contrast to digital photography, where you have the freedom to tweak and enhance images for days.
Think about it: when you hold an instant print in your hand, there’s something special about that physical keepsake that a digital file just can’t replicate. Plus, instant film has its own personality with vibrant colors and distinct textures, leaving ample room for creativity when you add digital layers to it. For example, you might take a beautiful instant print of a sunset and then digitally overlay some text or graphics for an eye-catching piece.
Engaging with both mediums opens up a world of experimentation. You start to see how art evolves and how each technique adds its own flavor to your work. It’s like having a playground for your creative ideas! Speaking of creativity, let’s talk about how to effectively use these tools to tell a story in your photography. Proper maintenance using camera lens cleaning kits can ensure your equipment stays in top shape to capture those perfect shots every time.
Frequently Asked Questions
Can You Double Exposure on Instax?
Absolutely, we can use double exposure techniques with Instax! Isn’t it exciting to explore instant camera creativity? By experimenting with film layering methods, we’ll capture unique images that reveal stunning visual stories. Let’s get started!
How Do You Do Double Exposure on a Polaroid Camera?
To achieve double exposure on a Polaroid, we can use layering images by pressing the self-timer twice. With creative editing, we’ll explore unique results, embracing the unpredictability of each photograph we capture together.
How to Create a Double Exposure in Camera?
To create a double exposure, we’ll tweak our camera settings, select suitable film types, and apply exposure techniques. Let’s embrace creativity and make layered images that tell compelling stories together, just like old-school photographers!
Can You Do Double Exposure on a Disposable Camera?
Yes, we can experiment with double exposure on disposable cameras using film layering methods. While it’s tricky, incorporating creative photography tips and shooting the same scene twice can lead to unique and surprising results!